DOM
SWT
Integration
Logging
IDE
JxBrowser in Eclipse RCP application
This tutorial shows how to create an Eclipse RCP application and add JxBrowser library to it.
Prerequisites
To go through this tutorial you will need:
- Git
- Java 8 or higher
- A valid JxBrowser license. It can be either Evaluation or Commercial. For more information on licensing please see the licensing guide.
- Eclipse IDE for RCP and RAP Developers.
- An Eclipse workspace created.
Getting the code
To see a complete Eclipse RCP project created in this tutorial, please check out our collection of examples:
$ git clone https://github.com/TeamDev-IP/JxBrowser-Examples
$ cd JxBrowser-Examples/tutorials/eclipse-rcp
Adding the license
To run this tutorial you need to set up a license key.
Creating Eclipse RCP app
Follow the instruction and create a simple Eclipse RCP application.
Creating JxBrowser plug-in
To use JxBrowser in the Eclipse RCP application, in this tutorial we wrap the library into an Eclipse plug-in that can be consumed by other plug-ins.
To create JxBrowser plug-in, open Eclipse and switch to your workspace.
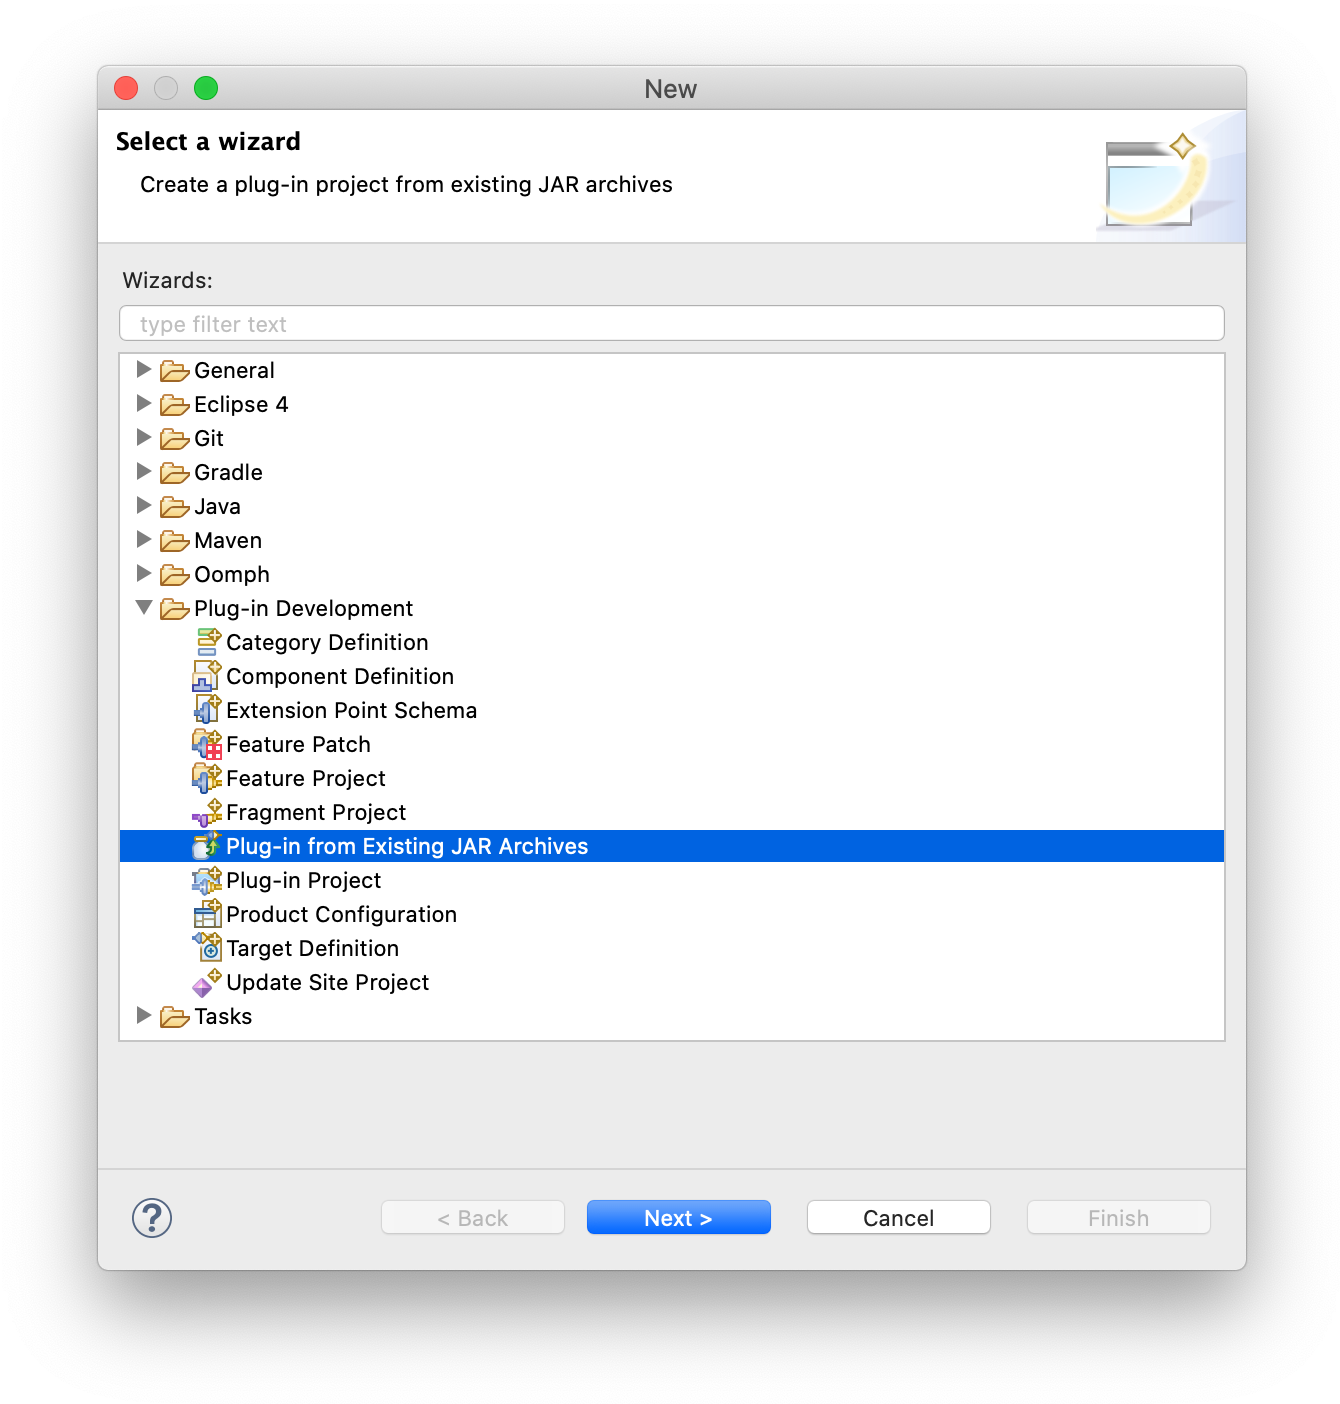
On the File menu, click New, and then click the Other….
In the opened dialog, in the Plug-in Development group, select Plug-in from Existing JAR Archive and click the Next button.
In the opened dialog, click Add External… to add the jxbrowser.jar and jxbrowser-swt.jar files as external JAR archives.
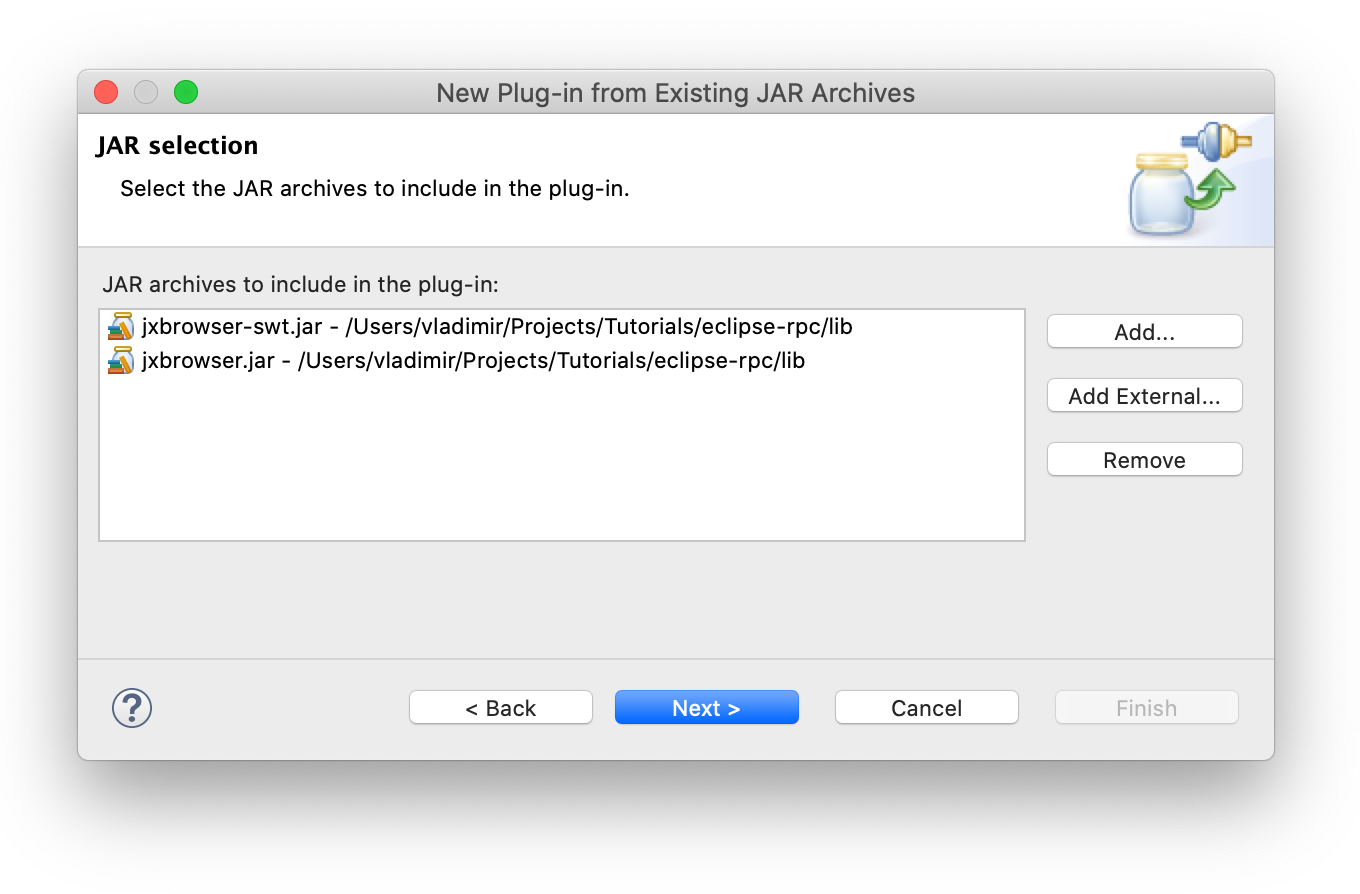
Click the Next button.
In the opened wizard, provide a valid project name, plug-in ID, version, name, vendor. Make sure that the Unzip the JAR archives into the project check box is cleared.
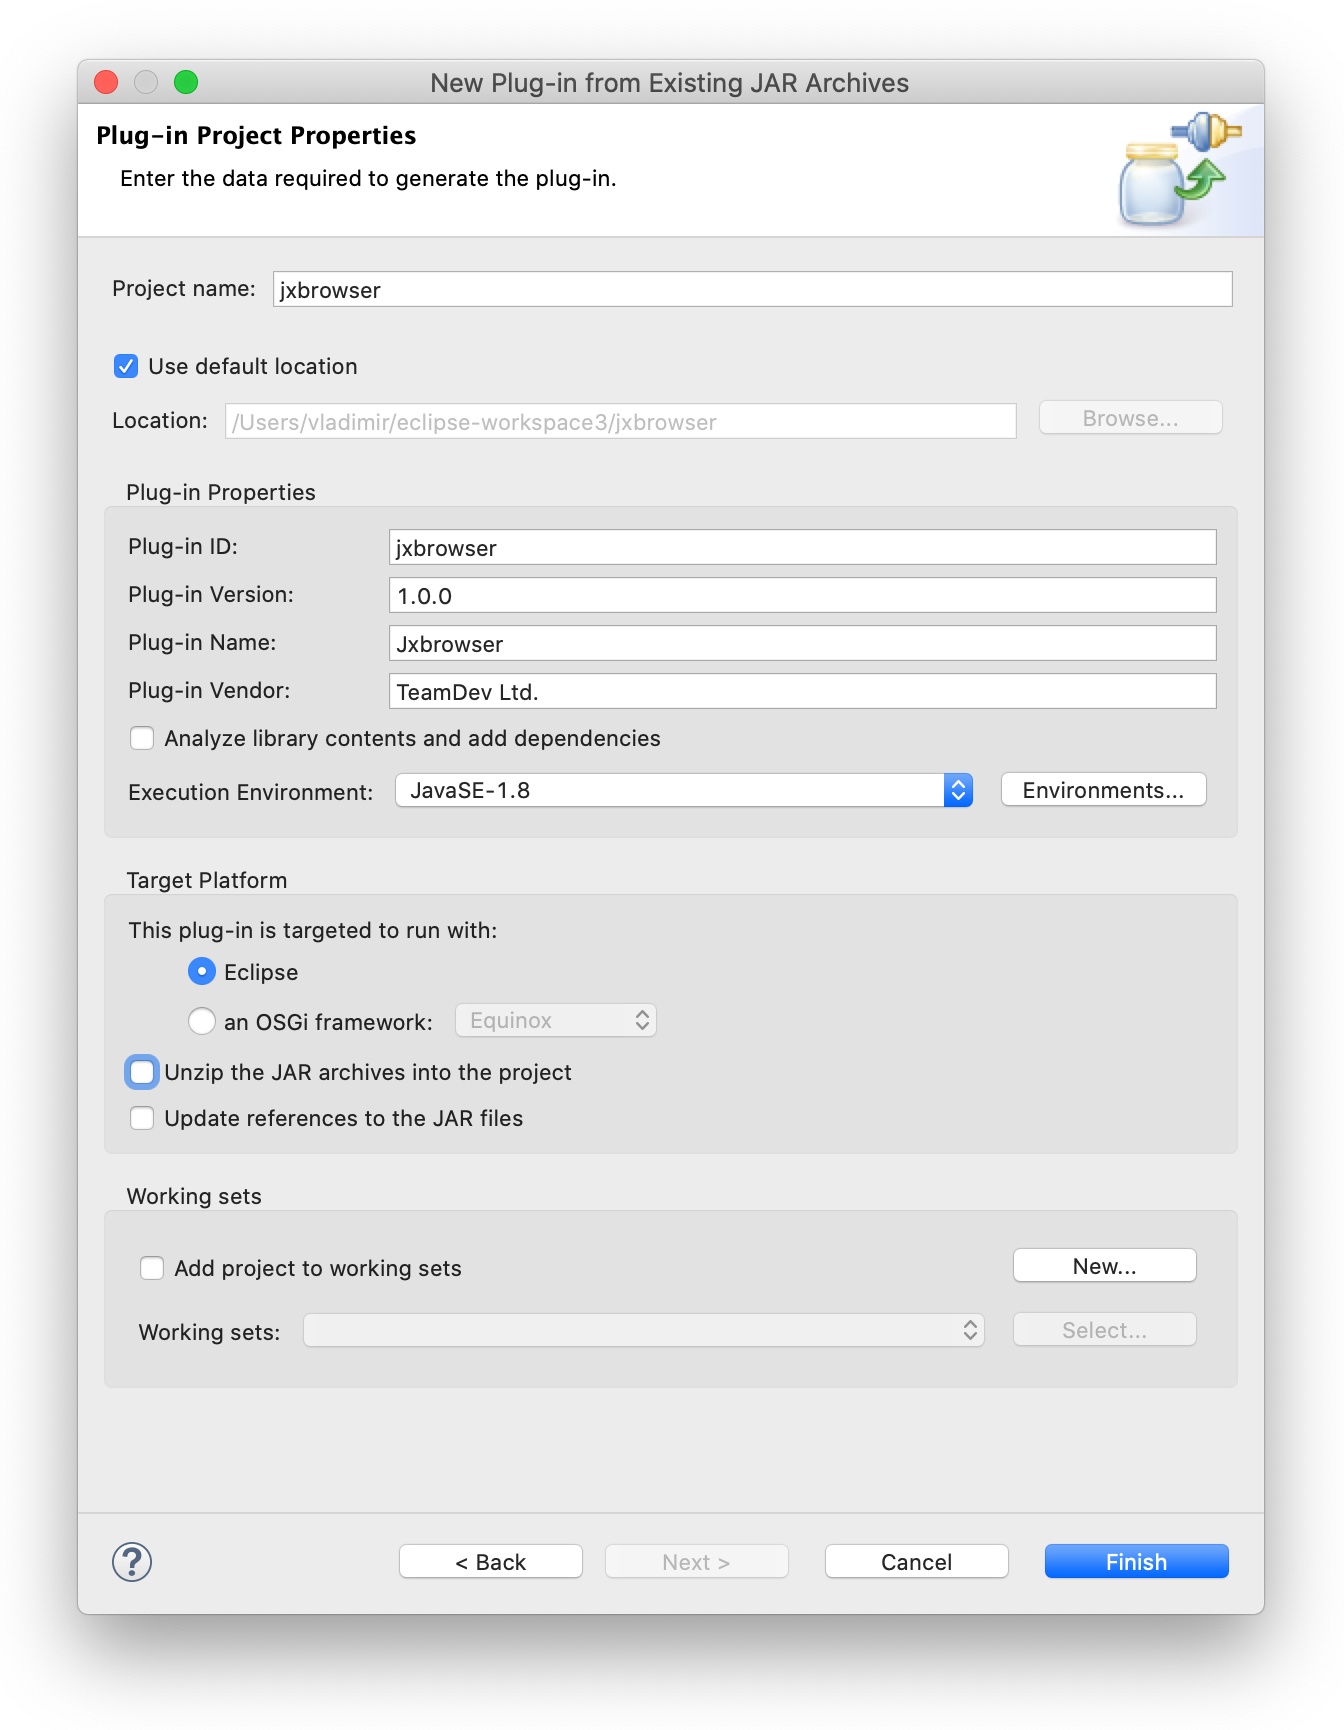
Click Finish to close the wizard.
Open the newly created MANIFEST.MF file and add dependency to SWT toolkit by adding the following line to the file:
Require-Bundle: org.eclipse.swt
Creating platform-specific fragments
After the core JxBrowser parts are integrated into Eclipse RCP environment, it is time to add the platform-specific components. For this, we are going to use so-called fragments.
As the official documentation puts it:
A fragment is used to replace or extend the functionality of an existing plug-in. A common use for fragments is to put environment (operating system, architecture, etc.) specific code into fragments.
JxBrowser is supplied with a number of platform-specific JARs. We are going to create the fragments for some of them as shown below.
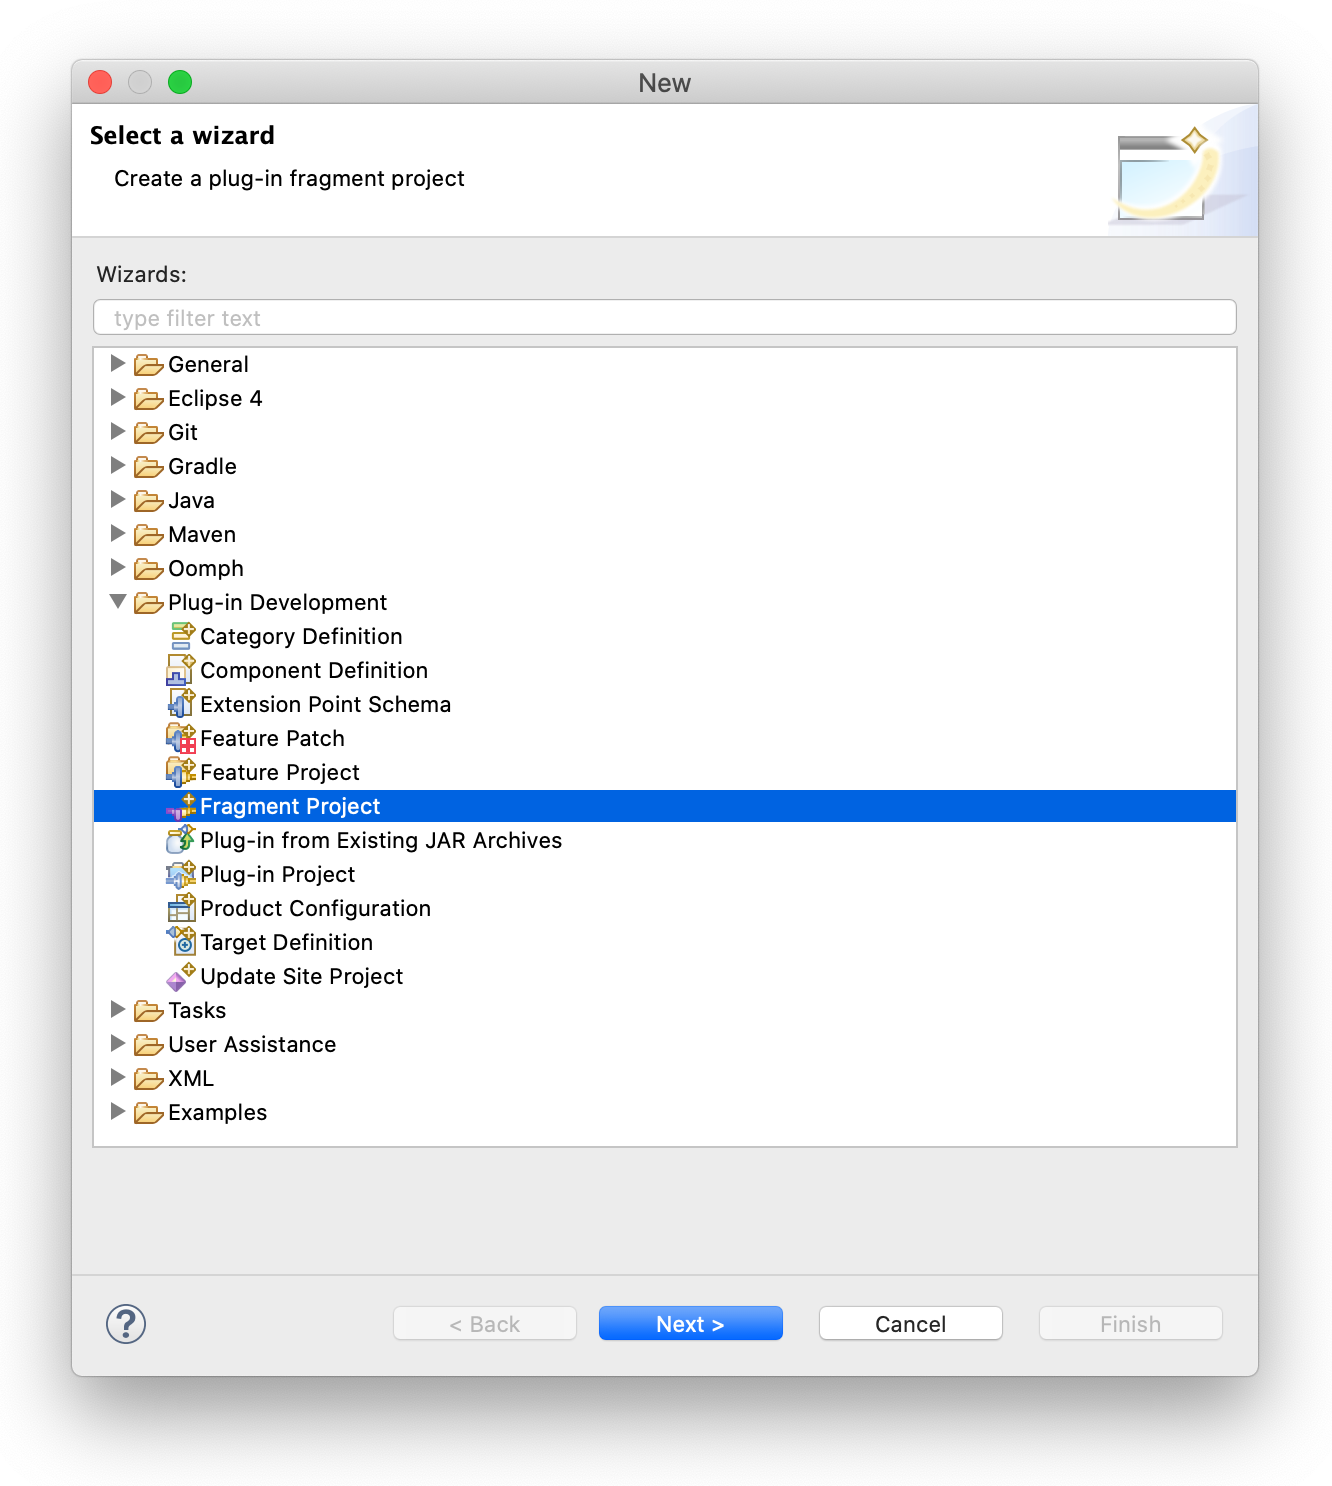
On the File menu, click New, and then click the Other….
In the opened dialog, in the Plug-in Development group, select Fragment Project and click the Next button.
In the opened wizard provide a valid project name for the platform-specific binaries. In this tutorial we configure our Eclipse RCP to work on macOS, so we add only JxBrowser JAR with the Chromium binaries for macOS platform.
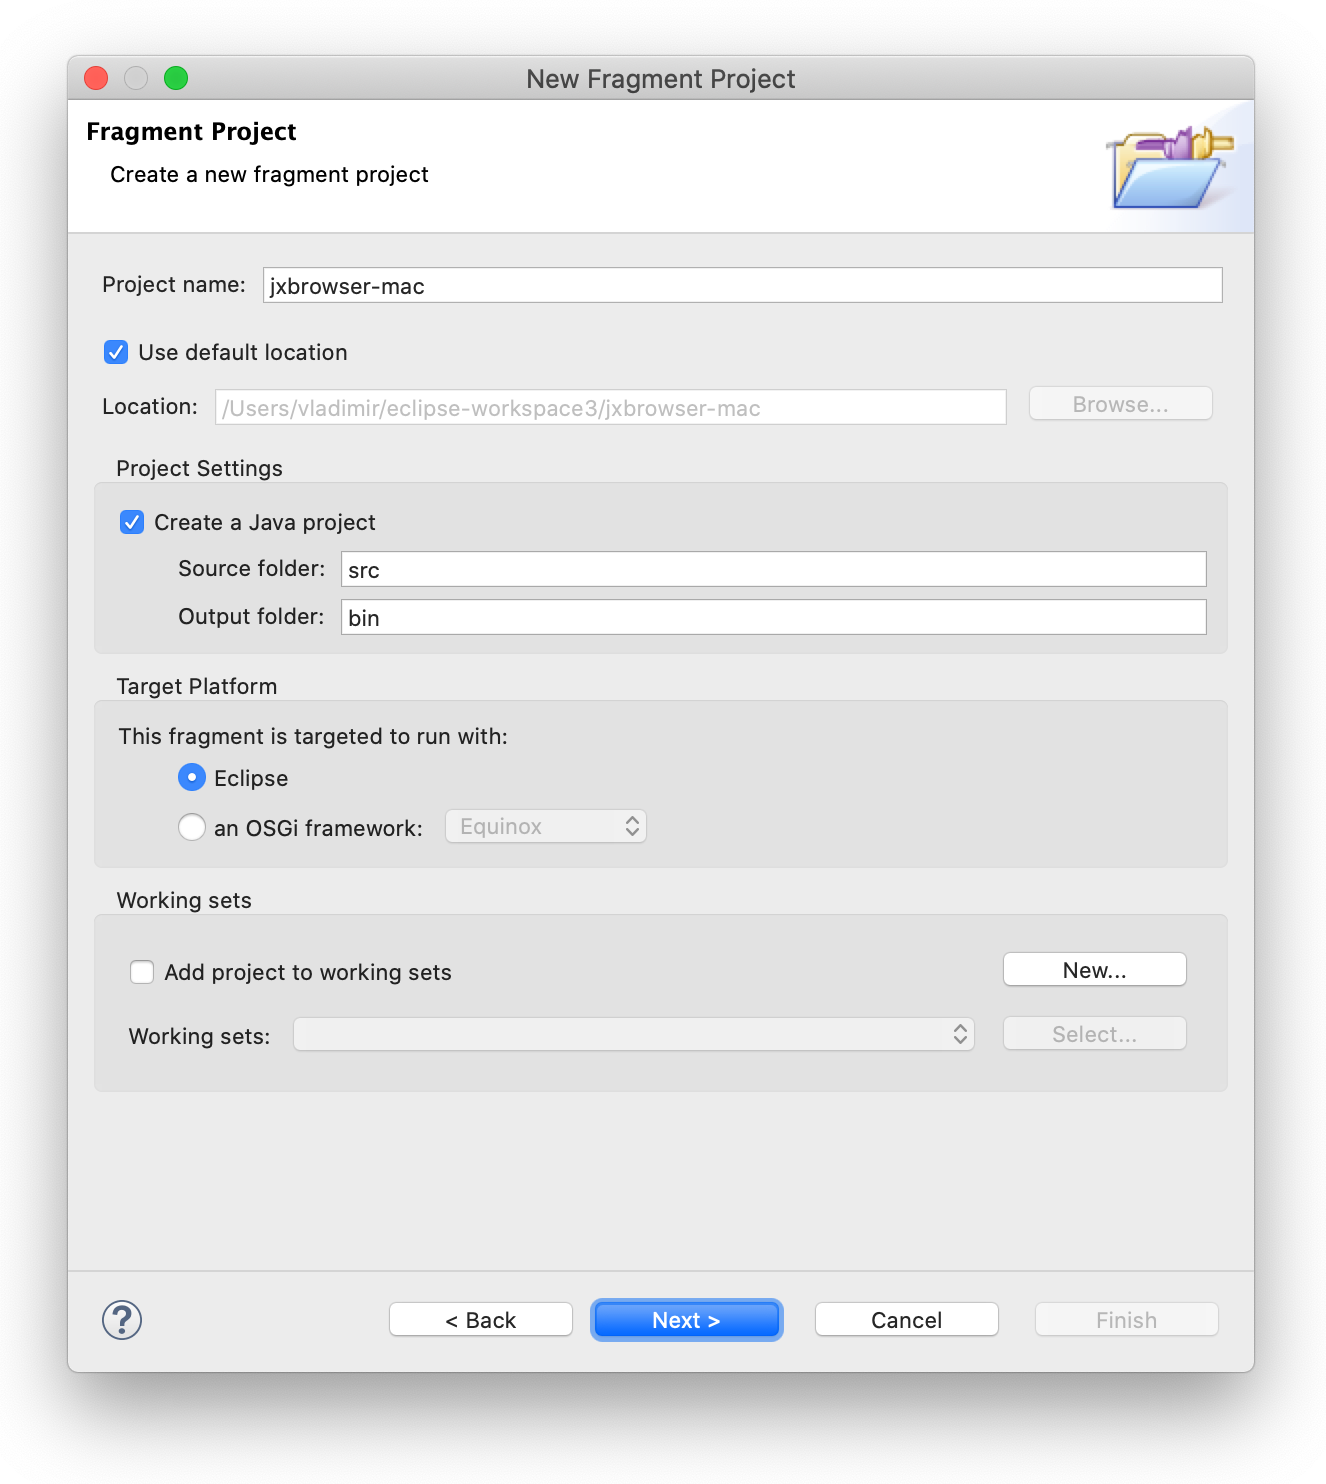
Click the Next button.
In the opened wizard, select the previously created plug-in in the Host Plug-in section.

Click the Finish button.
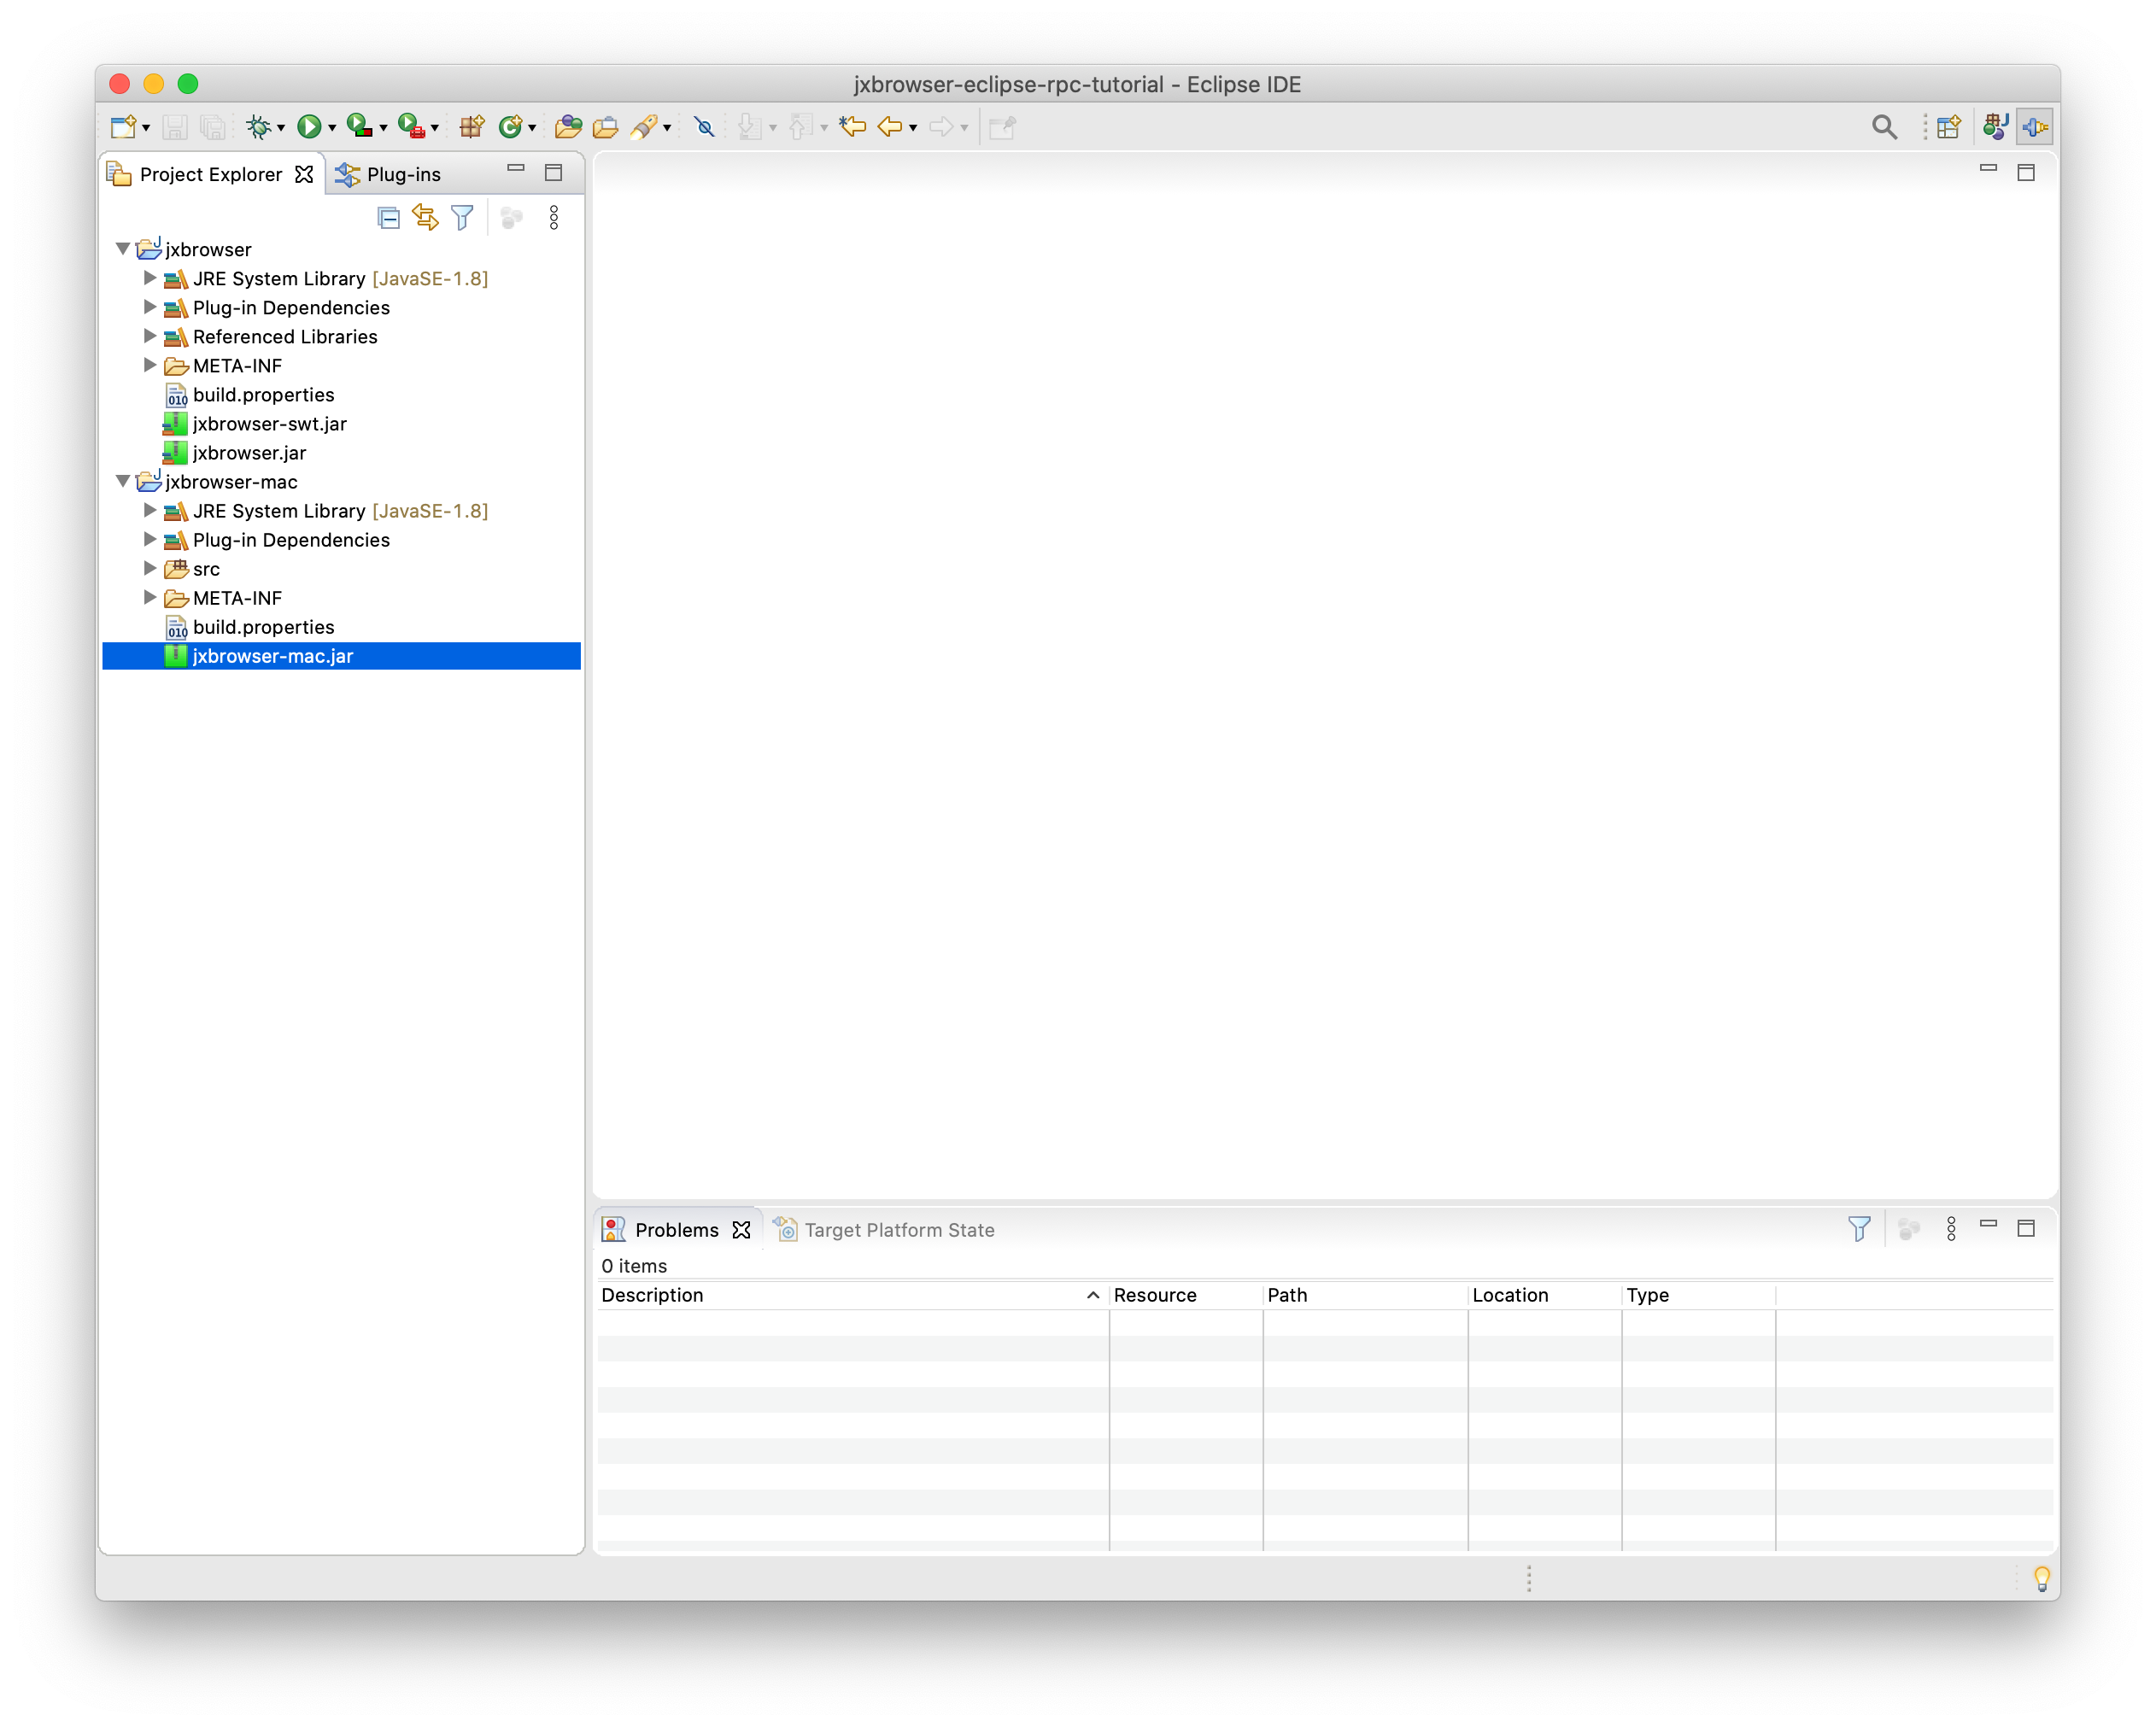
Copy the required JAR (e.g. jxbrowser-mac.jar for macOS) to the root directory of the newly created fragment.
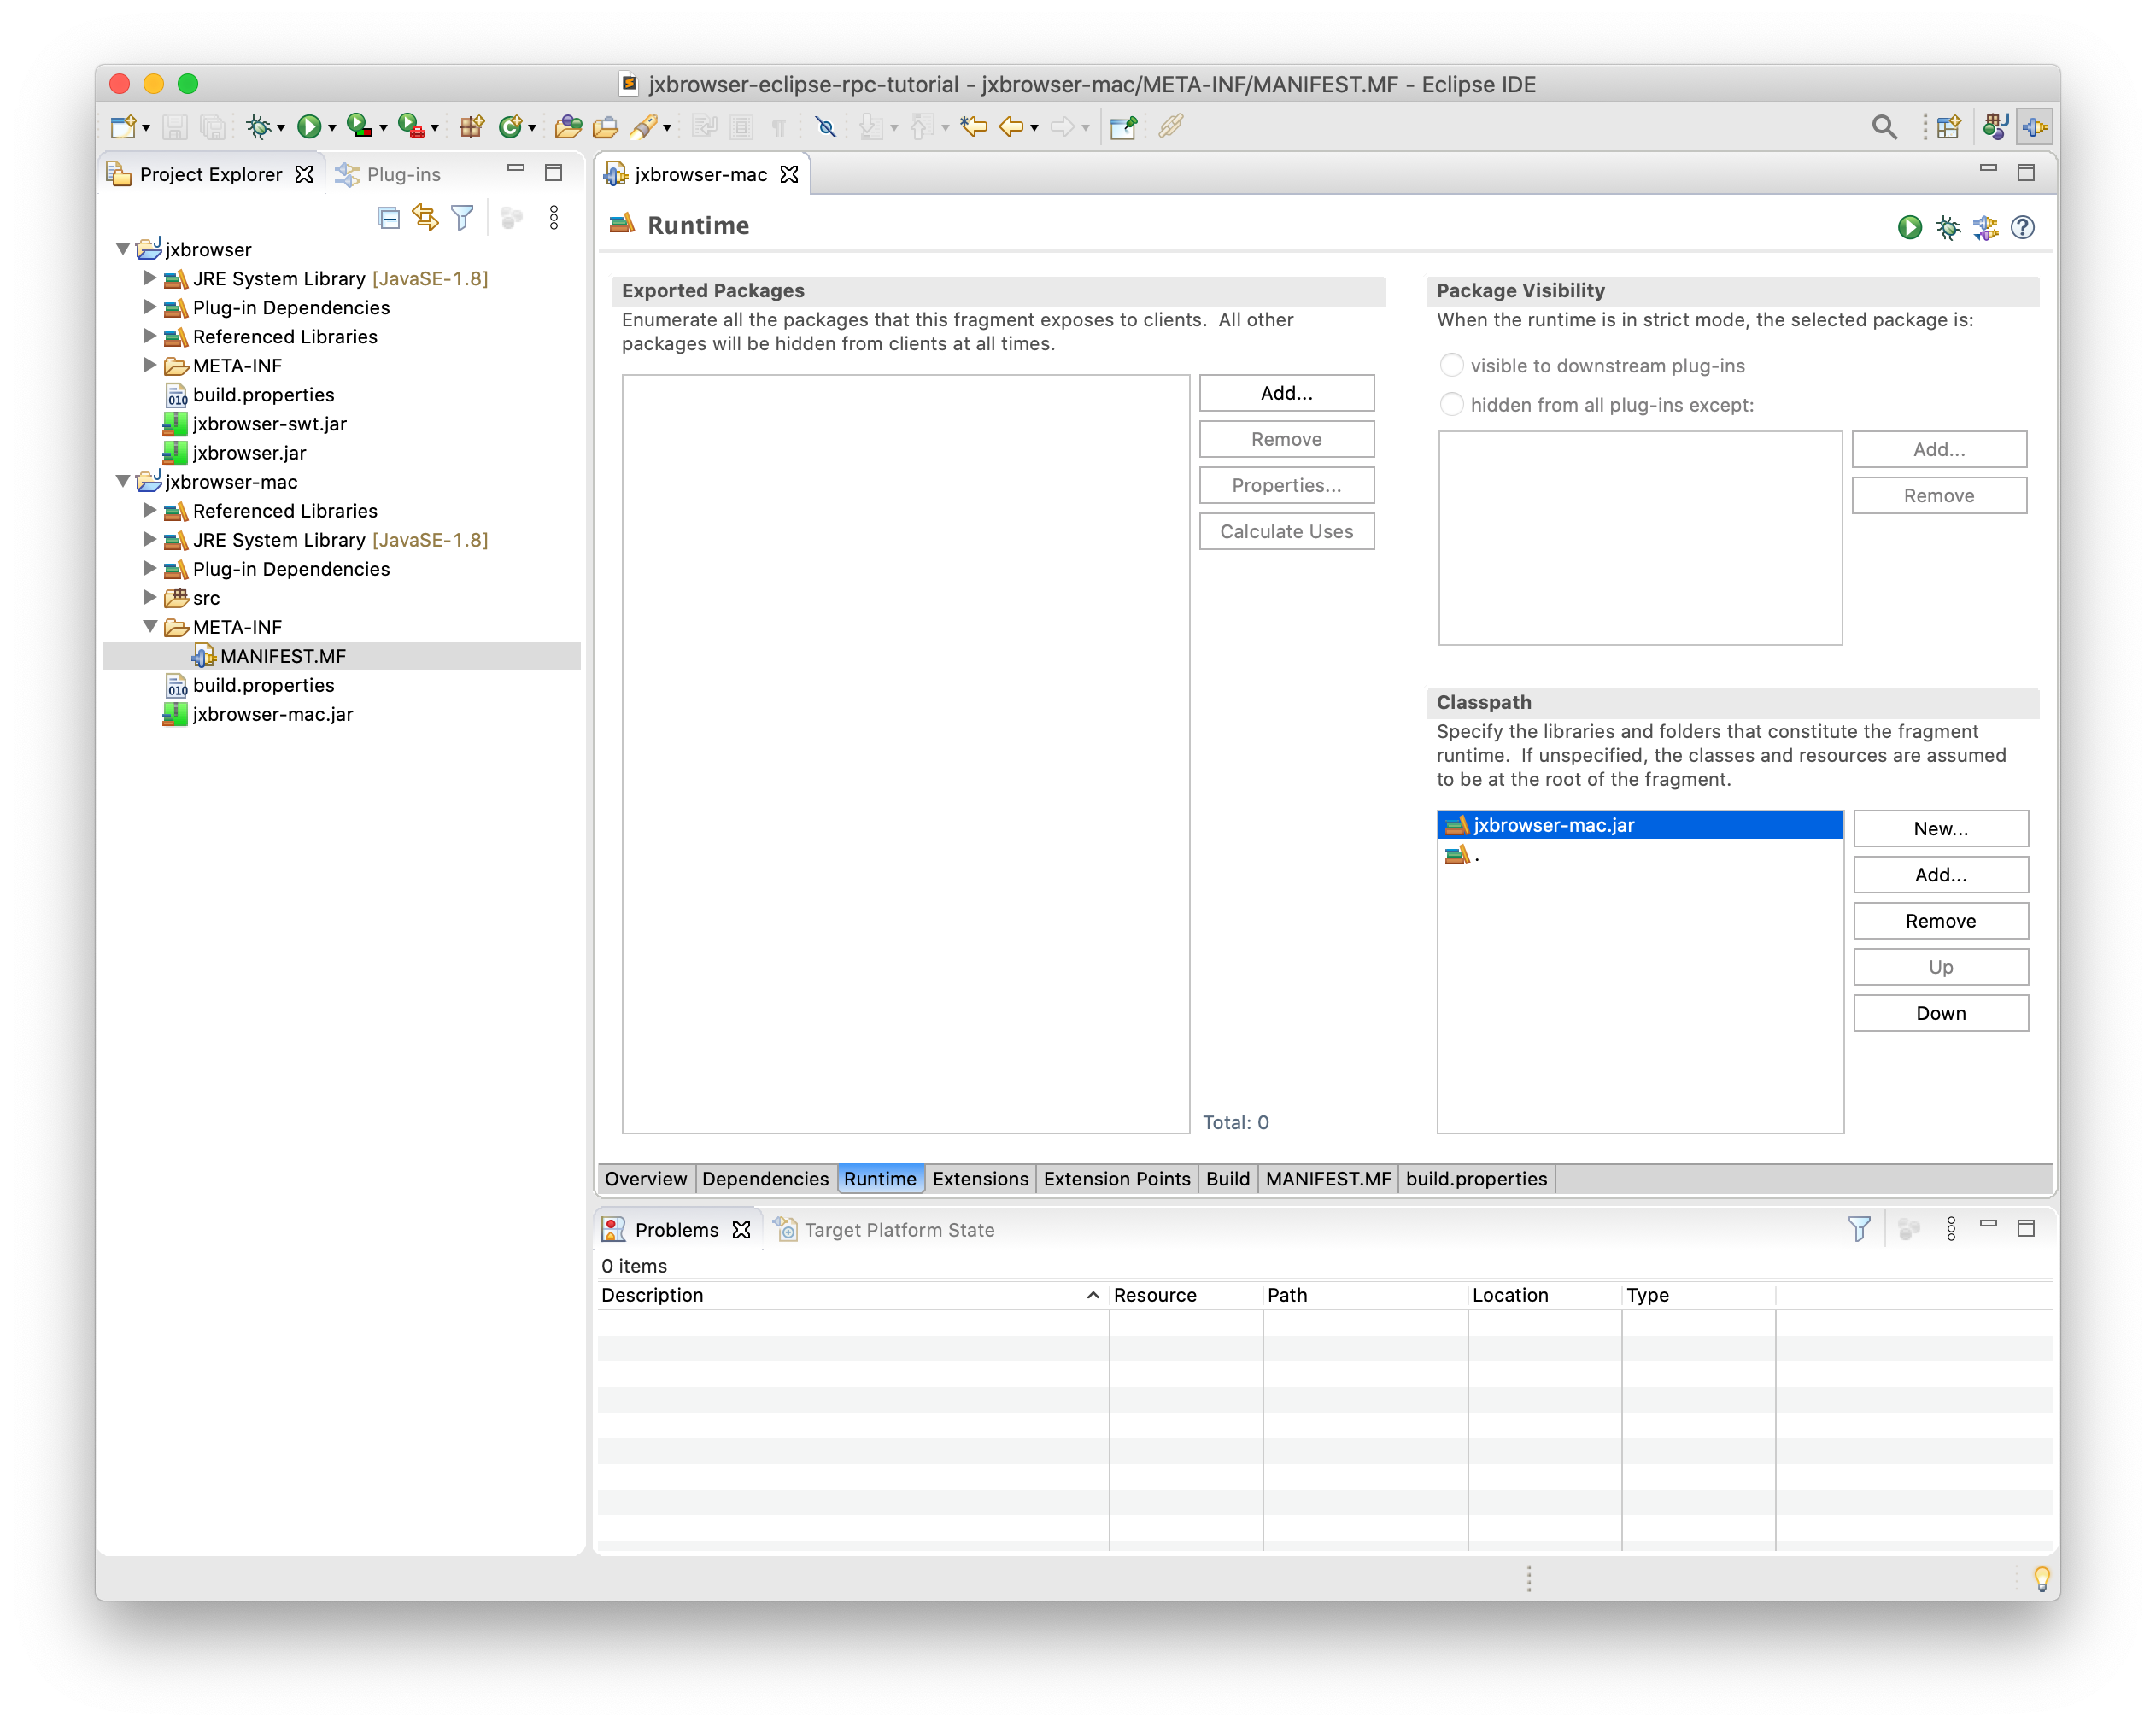
Open the MANIFEST.MF file.
In the Runtime tab, add the jxbrowser-mac.jar file into the classpath.
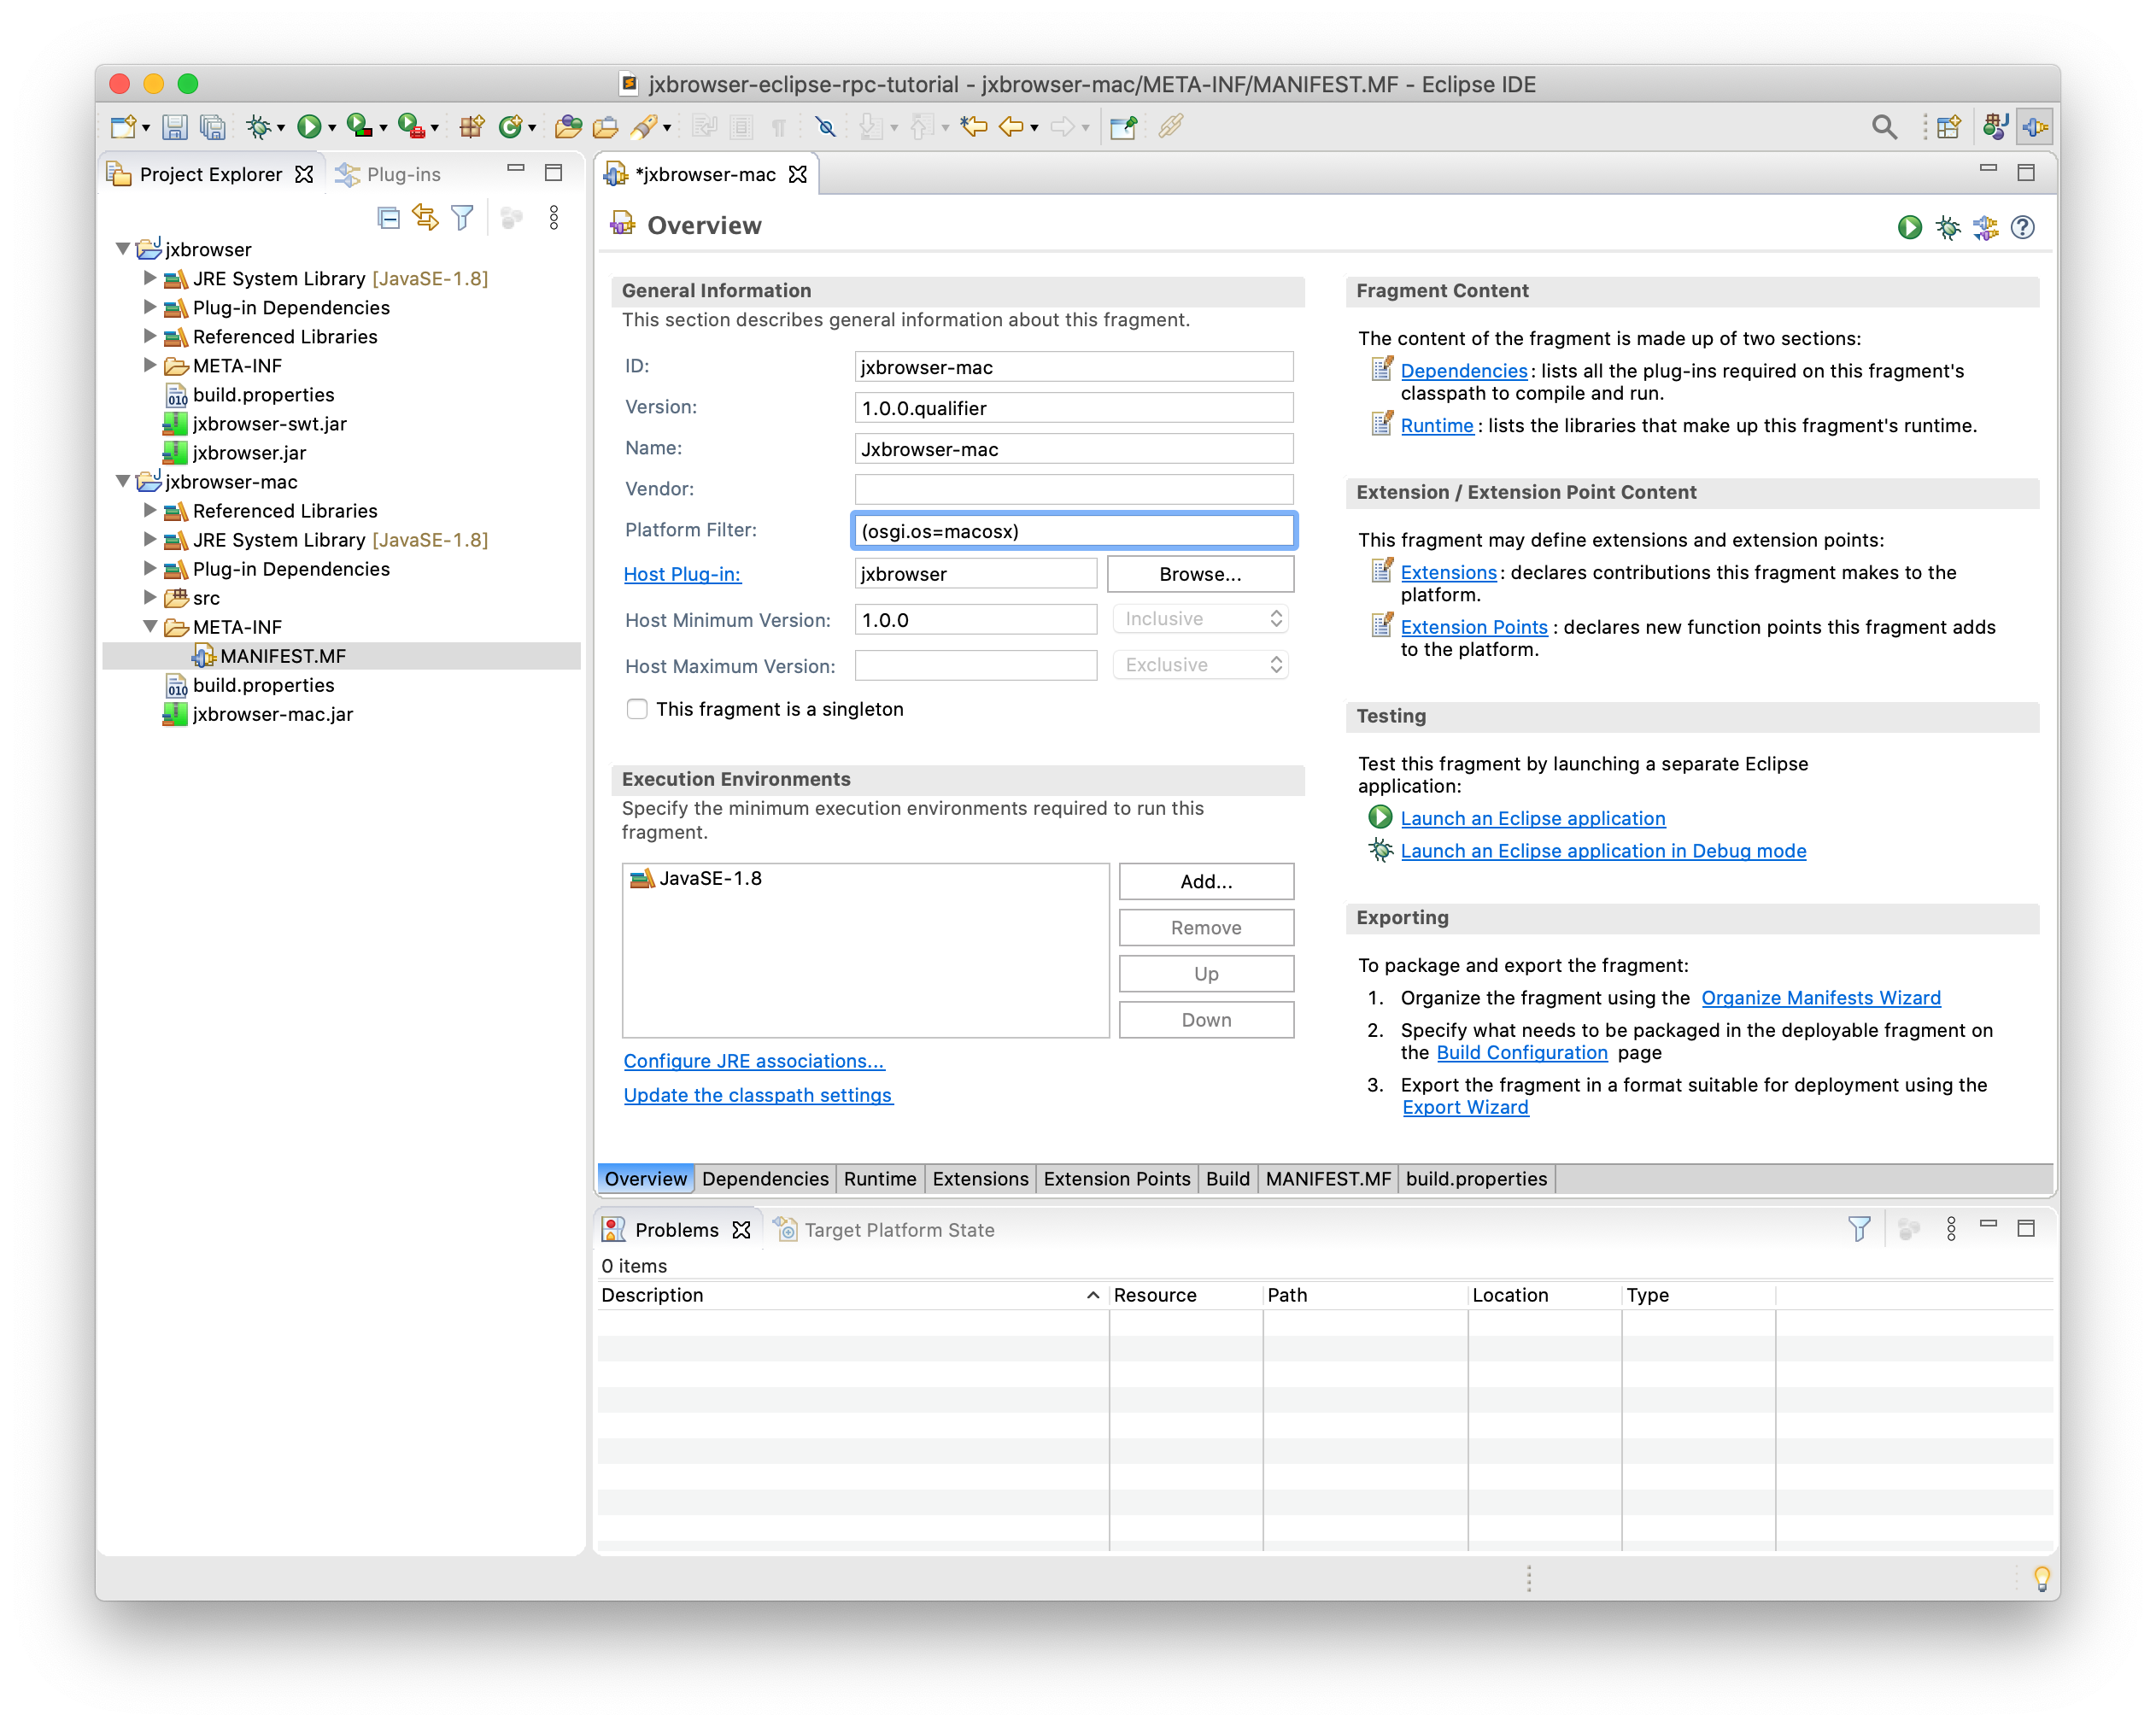
In the Overview tab, fill-in the Platform Filter text field with the expression matching your operating system:
| Platform | Platform Filter |
|---|---|
| Windows (32bit) | (& (osgi.os=win32) (osgi.arch=x86)) |
| Windows (64bit) | (& (osgi.os=win32) (osgi.arch=x86_64)) |
| Linux | (& (osgi.os=linux) (osgi.arch=x86_64)) |
| Linux (ARM) | (& (osgi.os=linux) (osgi.arch=arm)) |
| macOS | (osgi.os=macosx) |
Adding JxBrowser plug-in to RCP app
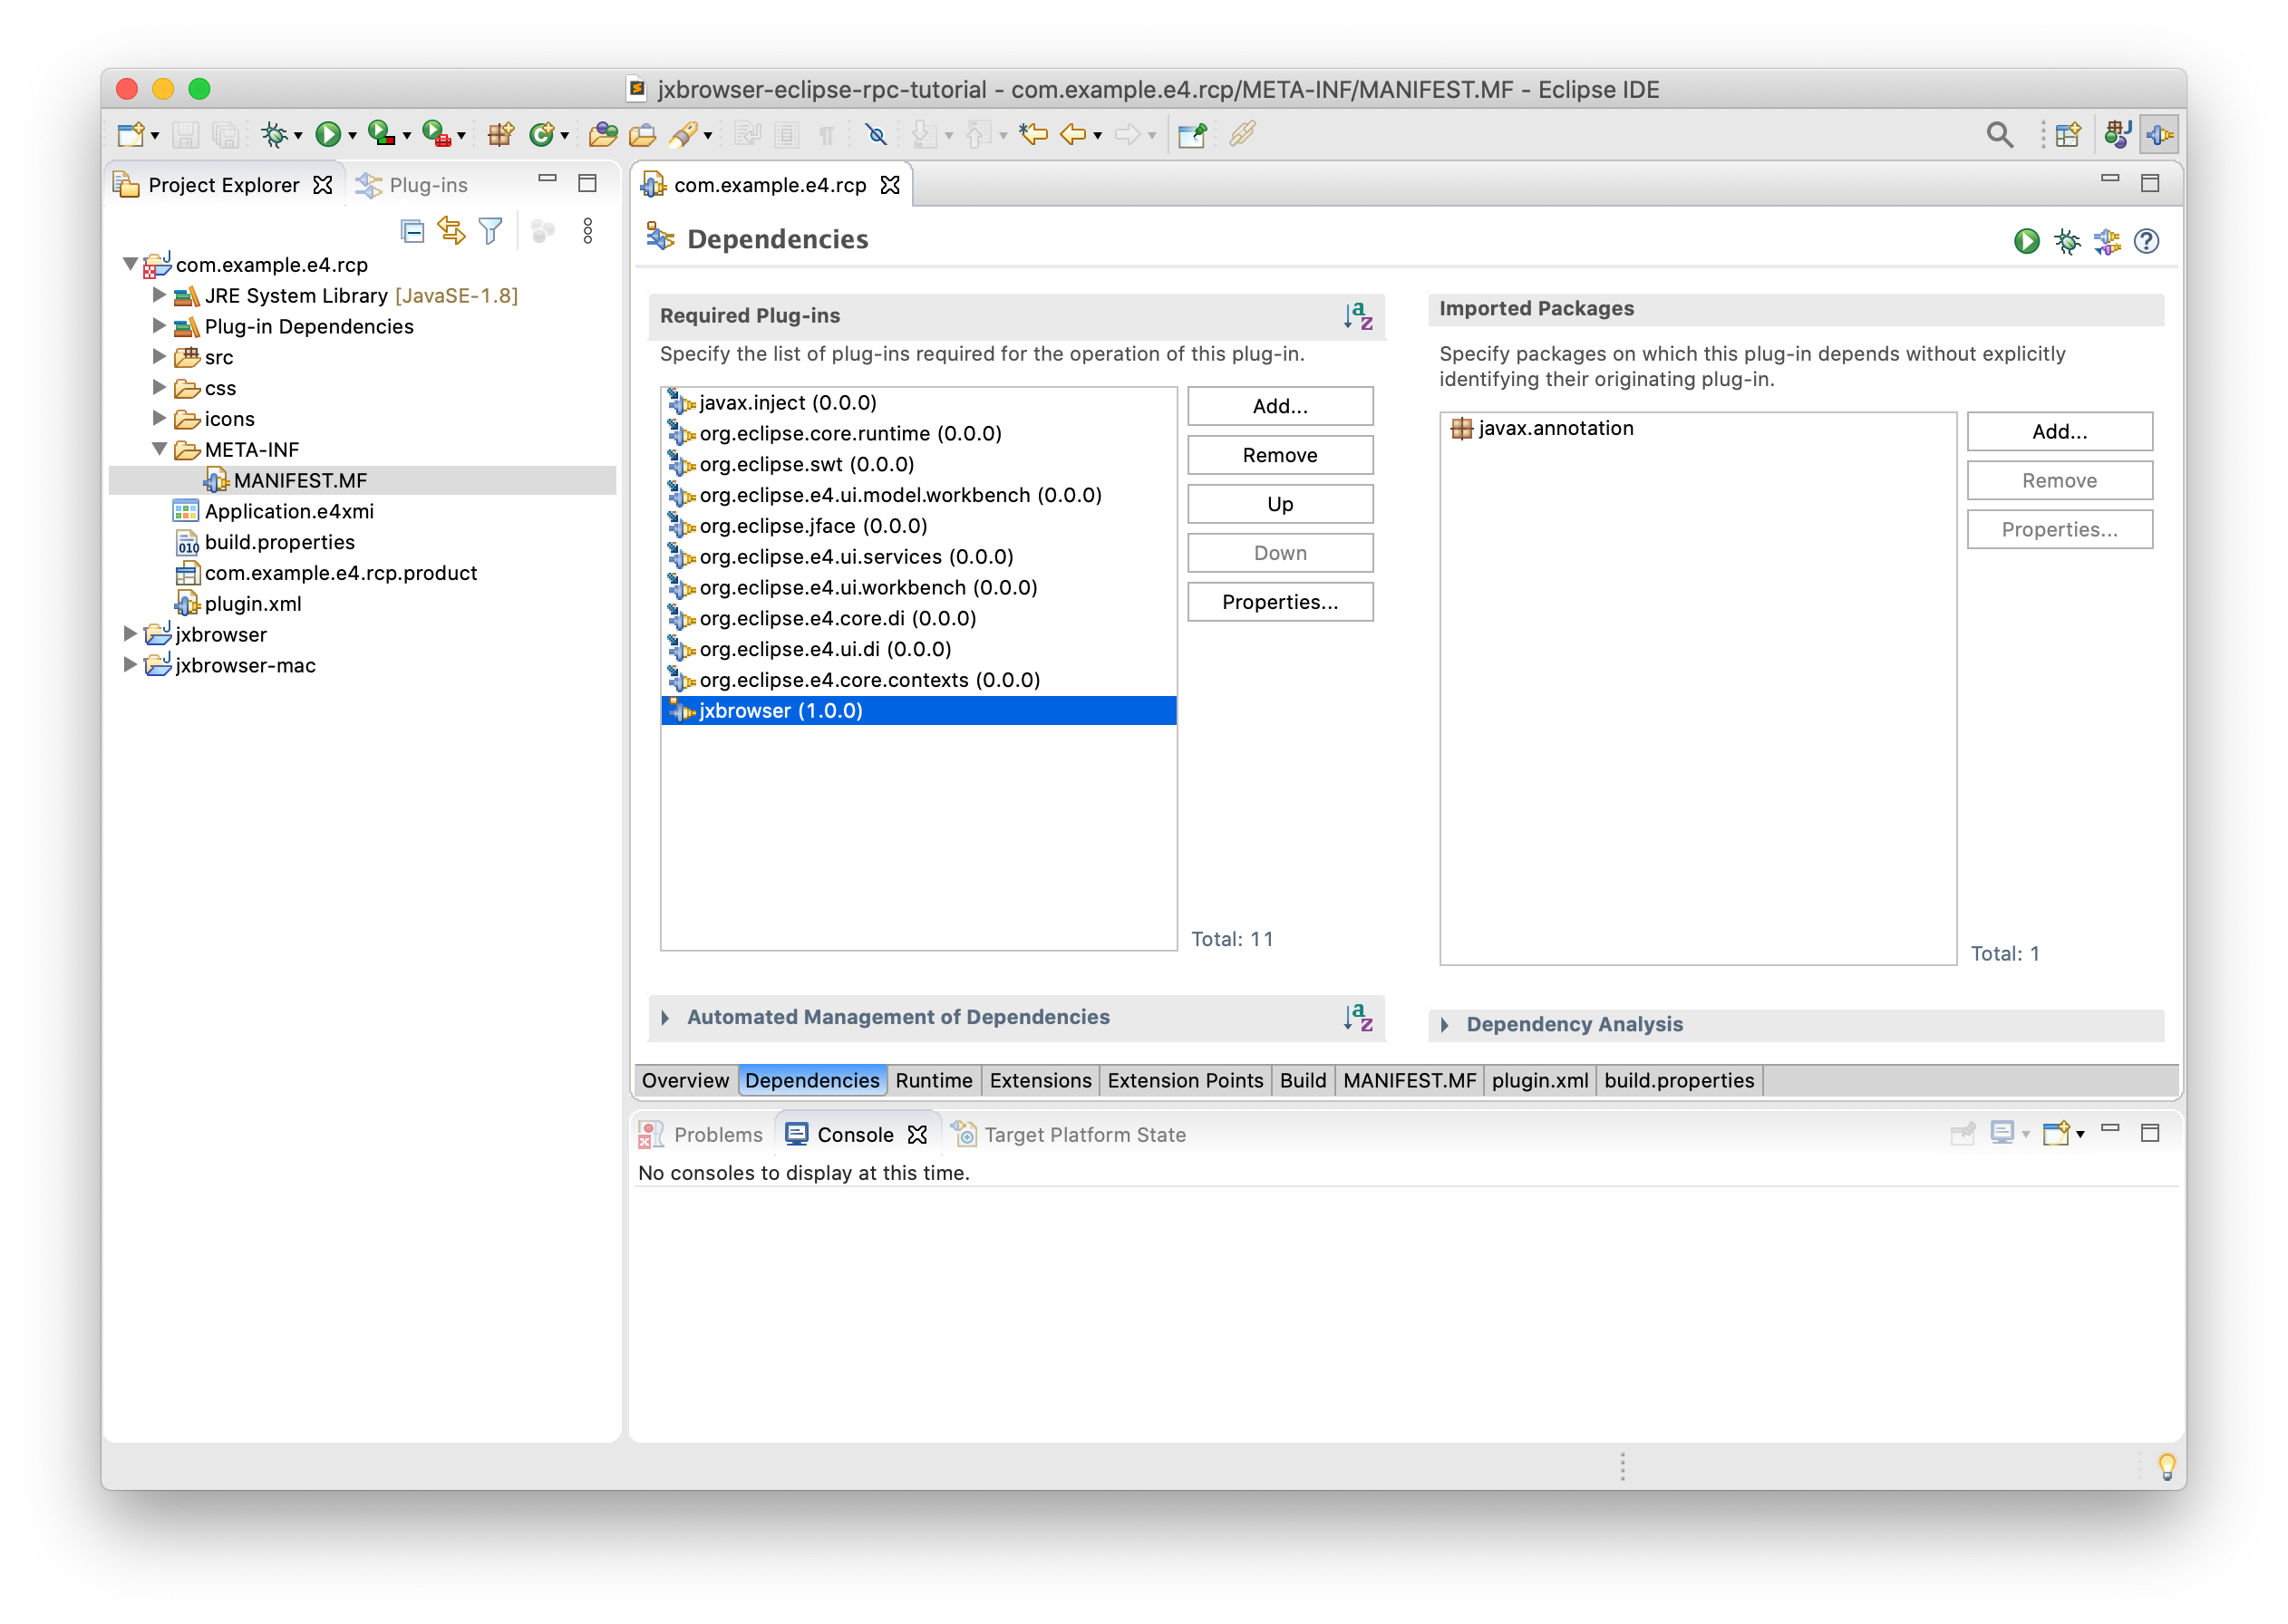
In the Eclipse RCP project open the MANIFEST.MF file.
In the Dependencies tab, in the Required Plug-ins section, click the Add… button to add the JxBrowser plug-in.
Open the Run Configurations dialog. In the Eclipse RCP App configuration open the Plug-ins tab and make sure that the JxBrowser plug-in and its fragment are enabled.
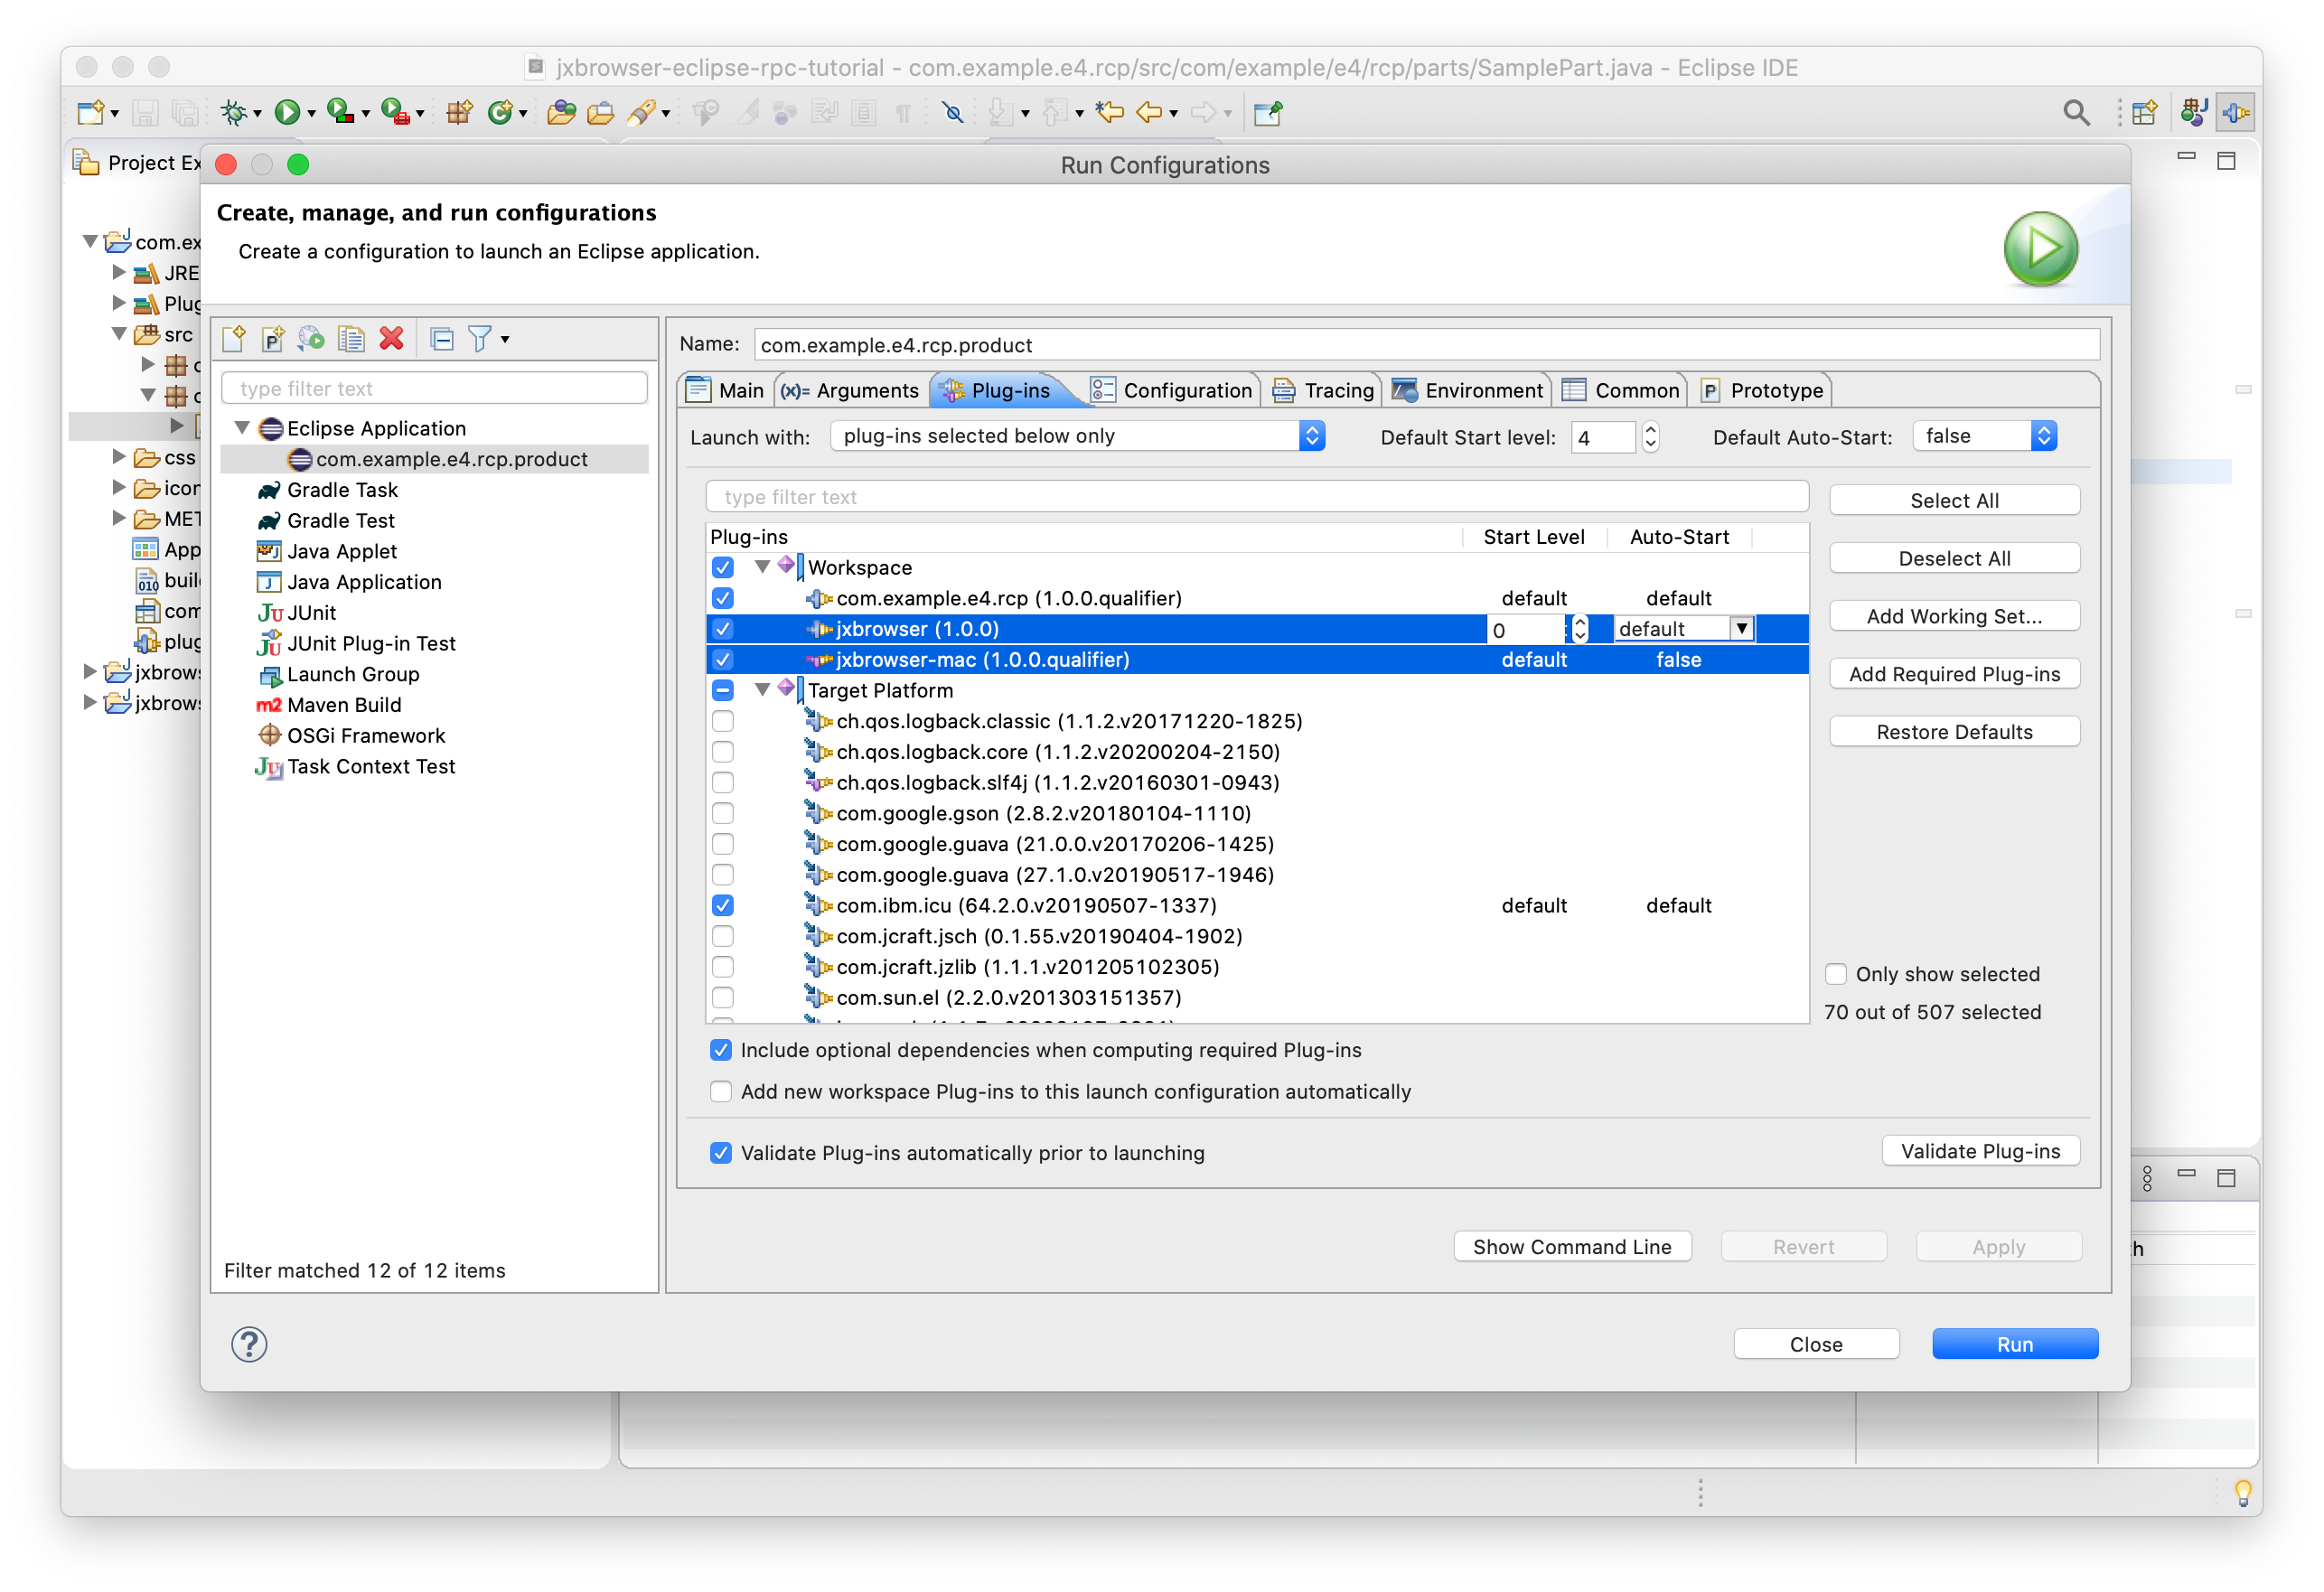
Click the Apply button to save the changes to this configuration.
Embedding SWT BrowserView
Open the com.example.e4.rcp.parts.SamplePart class and replace its content with the following code:
package com.example.e4.rcp.parts;

import static org.eclipse.swt.layout.GridData.FILL;

import com.teamdev.jxbrowser.browser.Browser;
import com.teamdev.jxbrowser.engine.Engine;
import com.teamdev.jxbrowser.engine.EngineOptions;
import com.teamdev.jxbrowser.engine.RenderingMode;
import com.teamdev.jxbrowser.view.swt.BrowserView;

import javax.annotation.PostConstruct;

import org.eclipse.swt.SWT;
import org.eclipse.swt.layout.GridData;
import org.eclipse.swt.layout.GridLayout;
import org.eclipse.swt.widgets.Composite;
import org.eclipse.swt.widgets.Text;

public class SamplePart {

    @PostConstruct
    public void createComposite(Composite parent) {
        parent.setLayout(new GridLayout(1, false));

        Engine engine = Engine.newInstance(
                EngineOptions.newBuilder(RenderingMode.HARDWARE_ACCELERATED)
                        .licenseKey("your_license_key")
                        .build());
        Browser browser = engine.newBrowser();

        Text addressBar = new Text(parent, SWT.SINGLE);
        addressBar.setText("https://google.com");
        addressBar.addListener(SWT.Traverse, event -> {
            if (event.detail == SWT.TRAVERSE_RETURN) {
                browser.navigation().loadUrl(addressBar.getText());
            }
        });
        browser.navigation().loadUrl(addressBar.getText());

        GridData textGrid = new GridData();
        textGrid.horizontalAlignment = GridData.FILL;
        addressBar.setLayoutData(textGrid);

        BrowserView view = BrowserView.newInstance(parent, browser);
        view.setLayoutData(new GridData(FILL, FILL, true, true));
    }
}
Replace your_license_key with a valid license key. Save the changes.
Running Eclipse RCP app
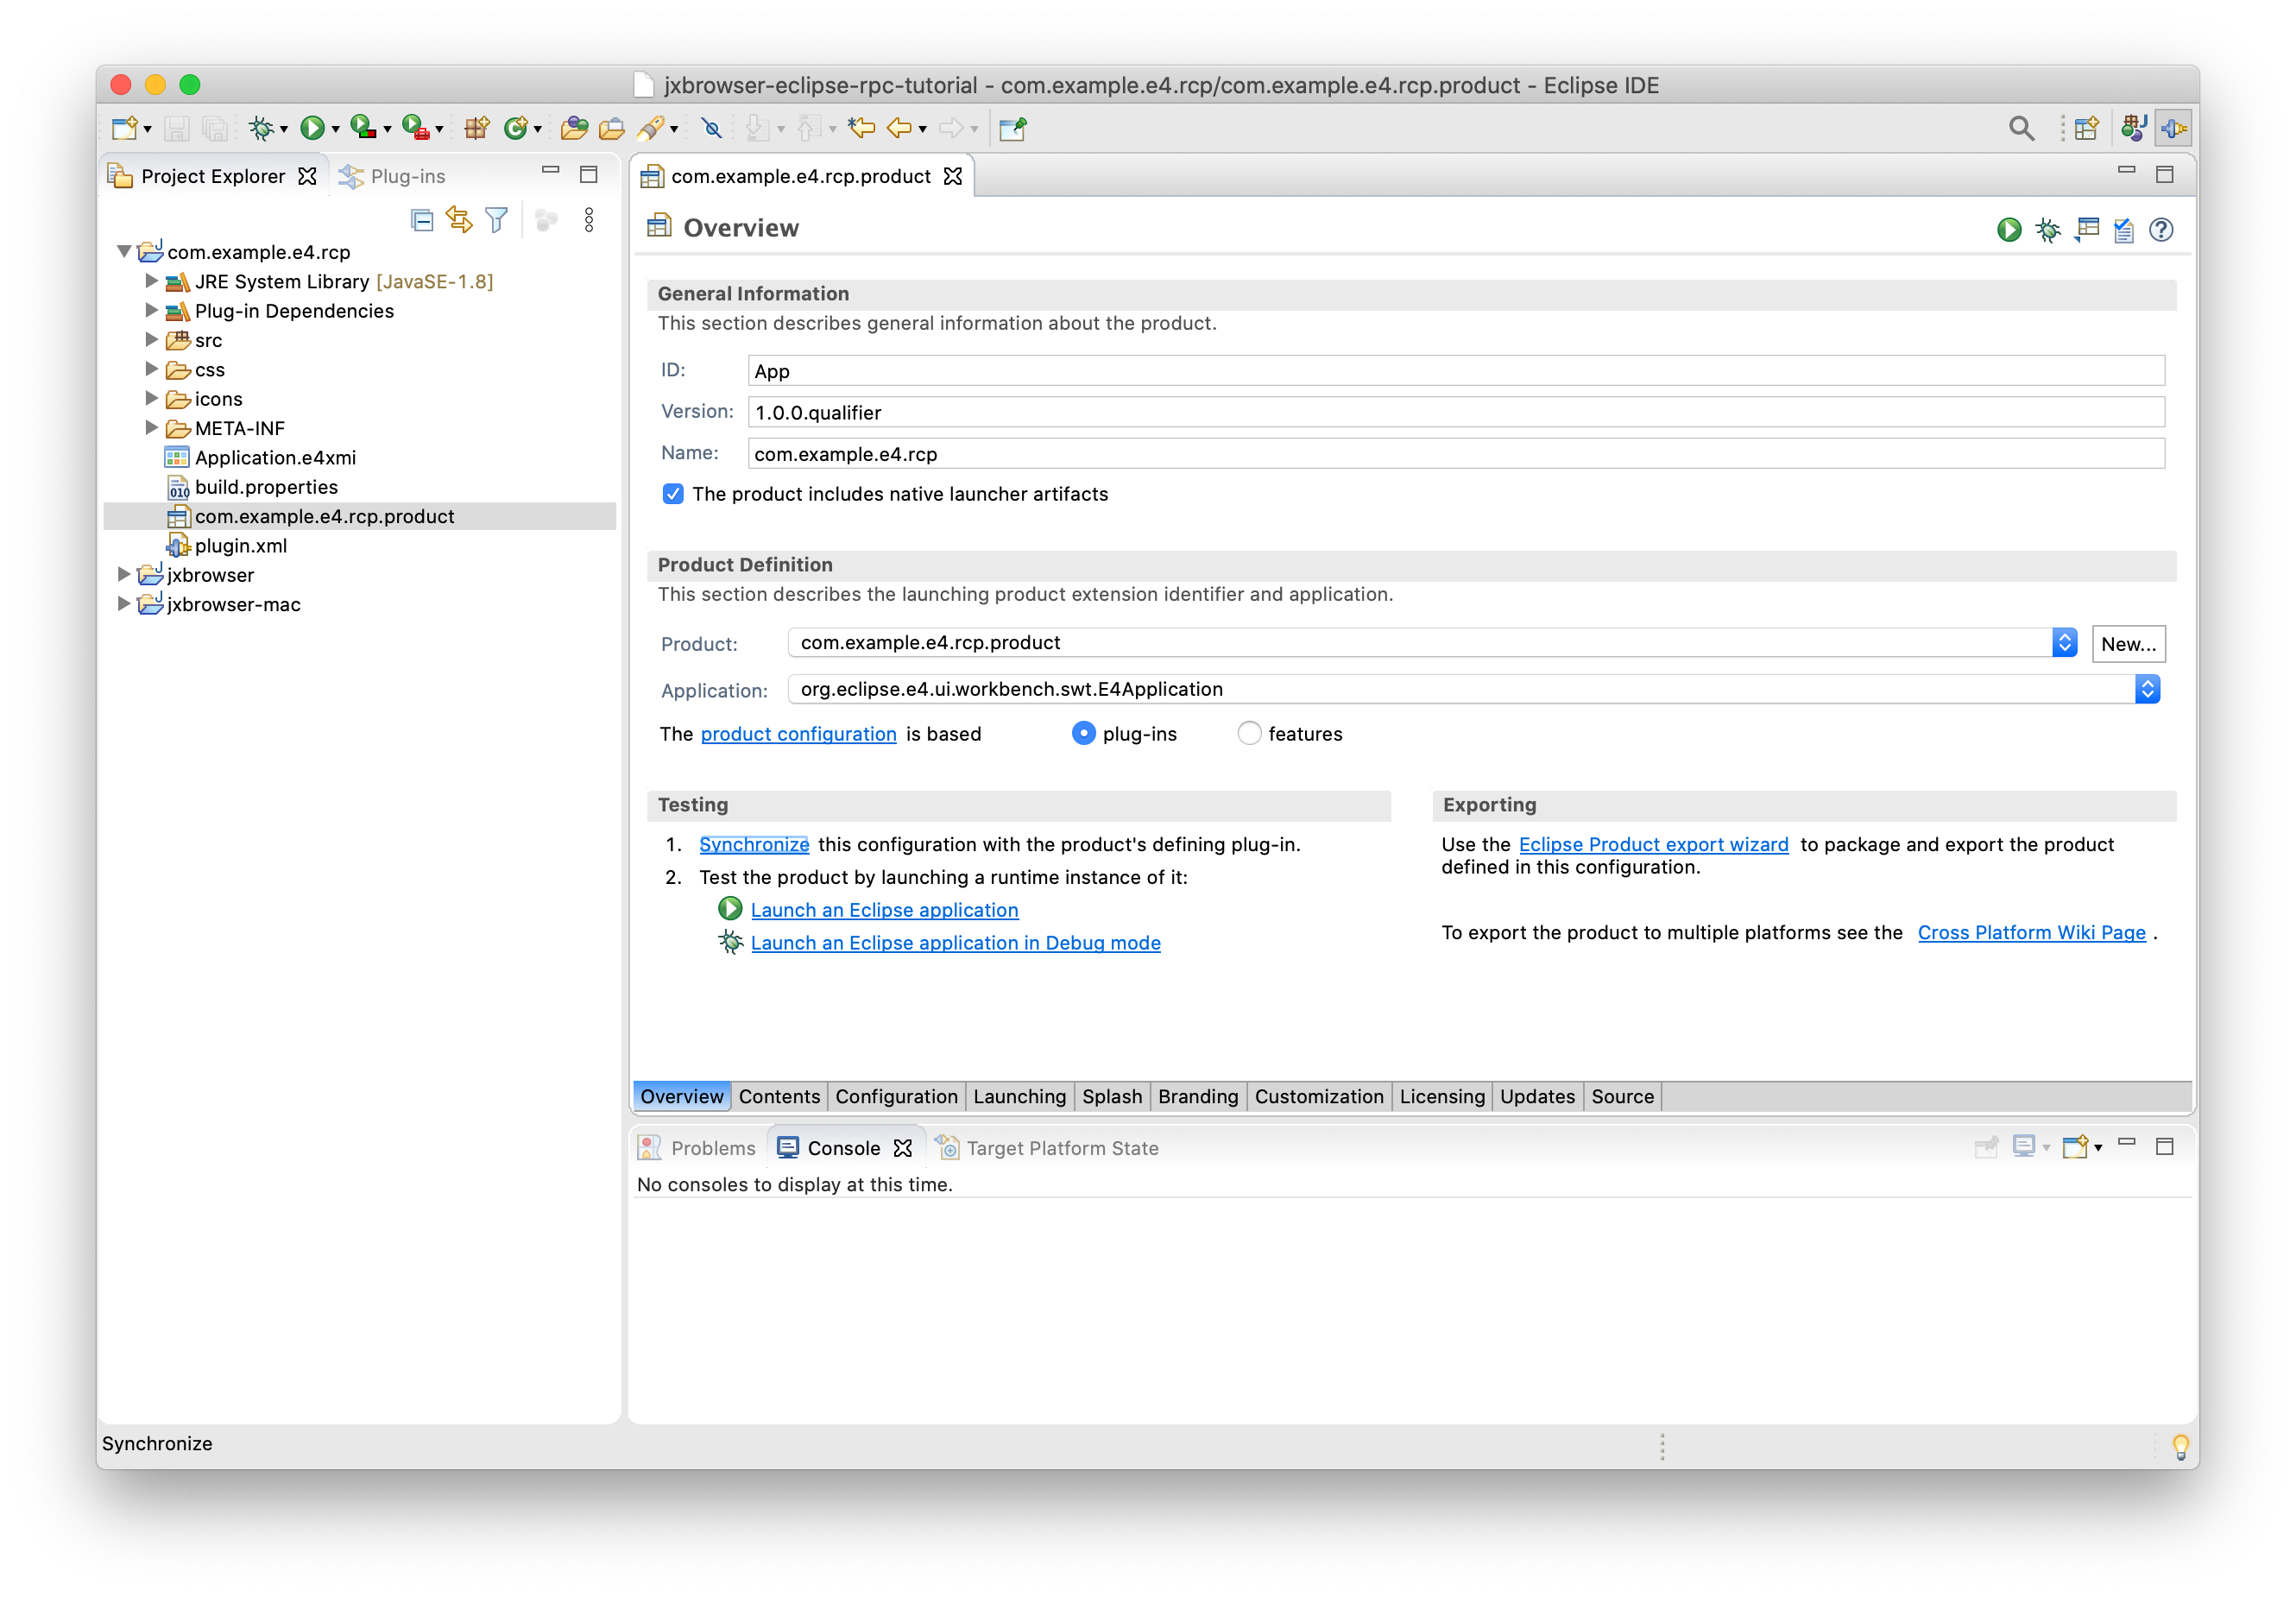
To run the Eclipse RCP application with the integrated JxBrowser SWT BrowserView open the com.example.e4.rcp.product file and click the Launch an Eclipse application link:
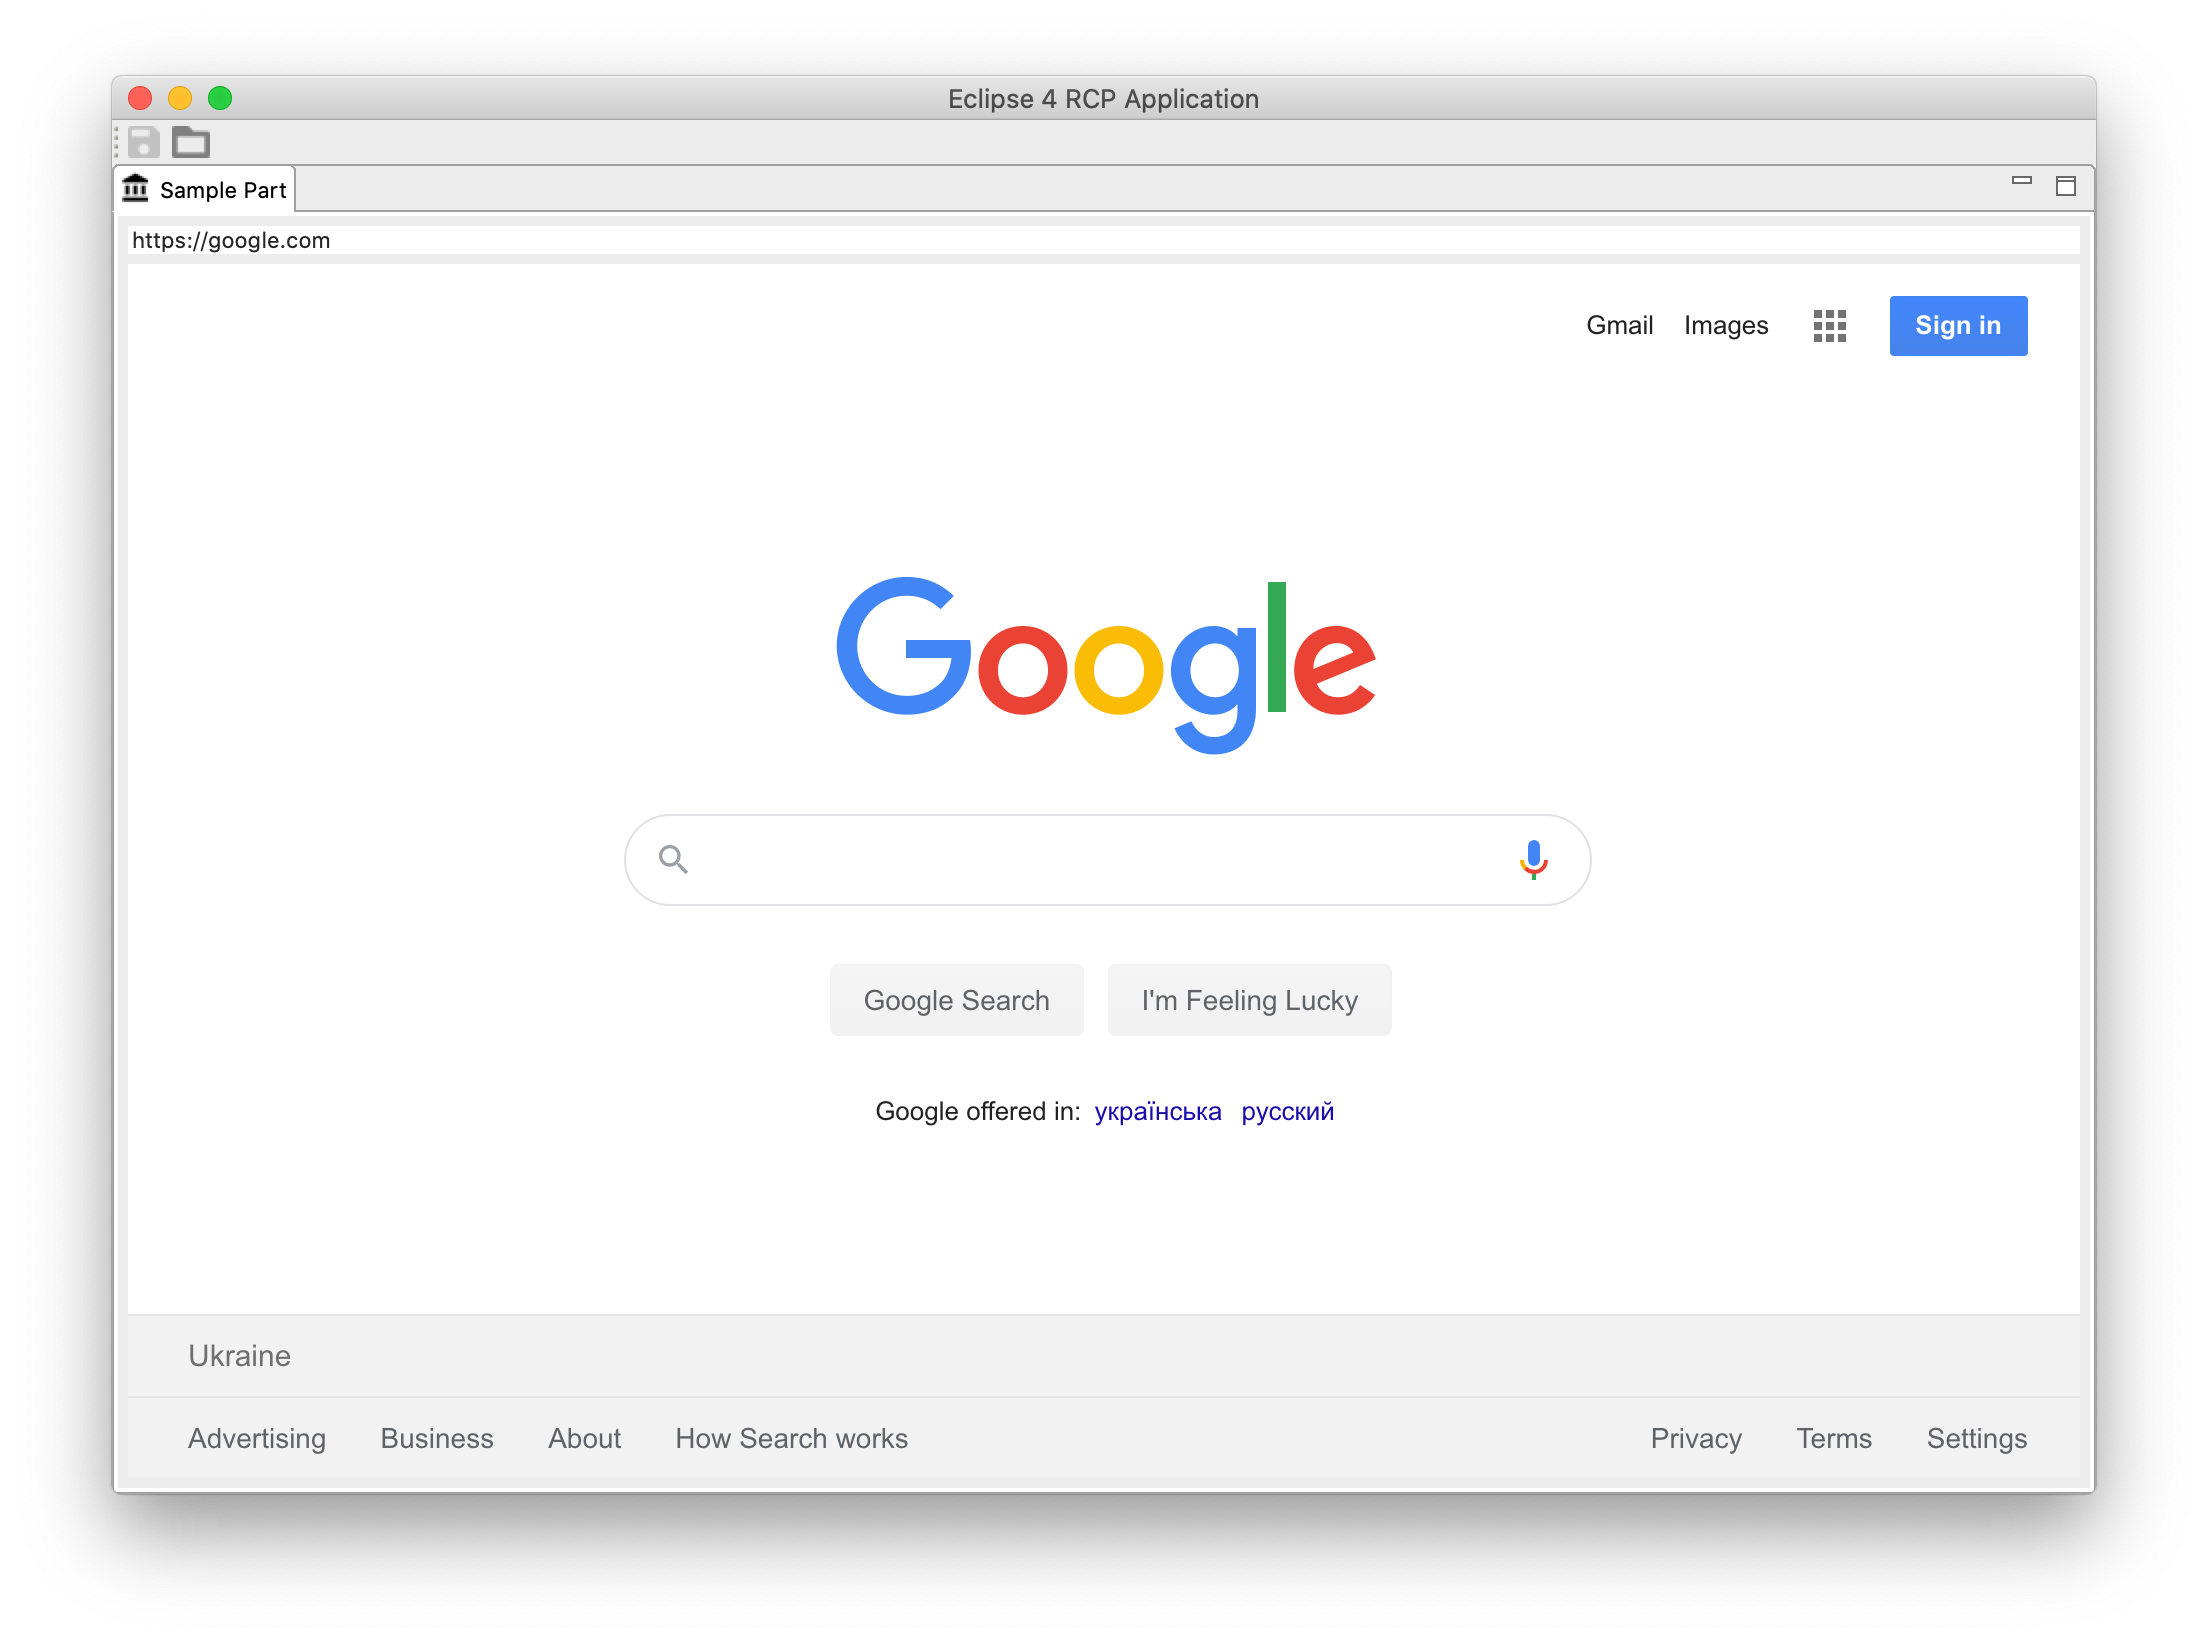
The output should be the following:
Summary
In this tutorial we:
- Create an Eclipse RCP application.
- Create and configure a JxBrowser plug-in.
- Create a platform-specific fragment for the macOS JxBrowser JAR file.
- Add the JxBrowser plug-in to the Eclipse RCP application.
- Embed the SWT
BrowserViewcontrol into the Eclipse RCP application to display web content.